Do you crave a warm, crumbly scone that melts in your mouth? Look no further! In this article, I’ll share an easy recipe for English scones, inspired by royal tradition. With just a few simple ingredients and steps, you can impress your friends or enjoy a delightful treat for yourself. Let’s dive into the world of scones and elevate your baking skills today!
Why I Love This Recipe
- Quick and Easy: This scone recipe comes together in just 35 minutes, making it perfect for a last-minute treat.
- Versatile Flavors: Add raisins, currants, or even chocolate chips to customize these scones to your taste.
- Perfectly Soft: The combination of ingredients ensures a light and fluffy texture that melts in your mouth.
- Classic Pairing: These scones are delightful when served warm with clotted cream and jam, ideal for a traditional afternoon tea.
Ingredients
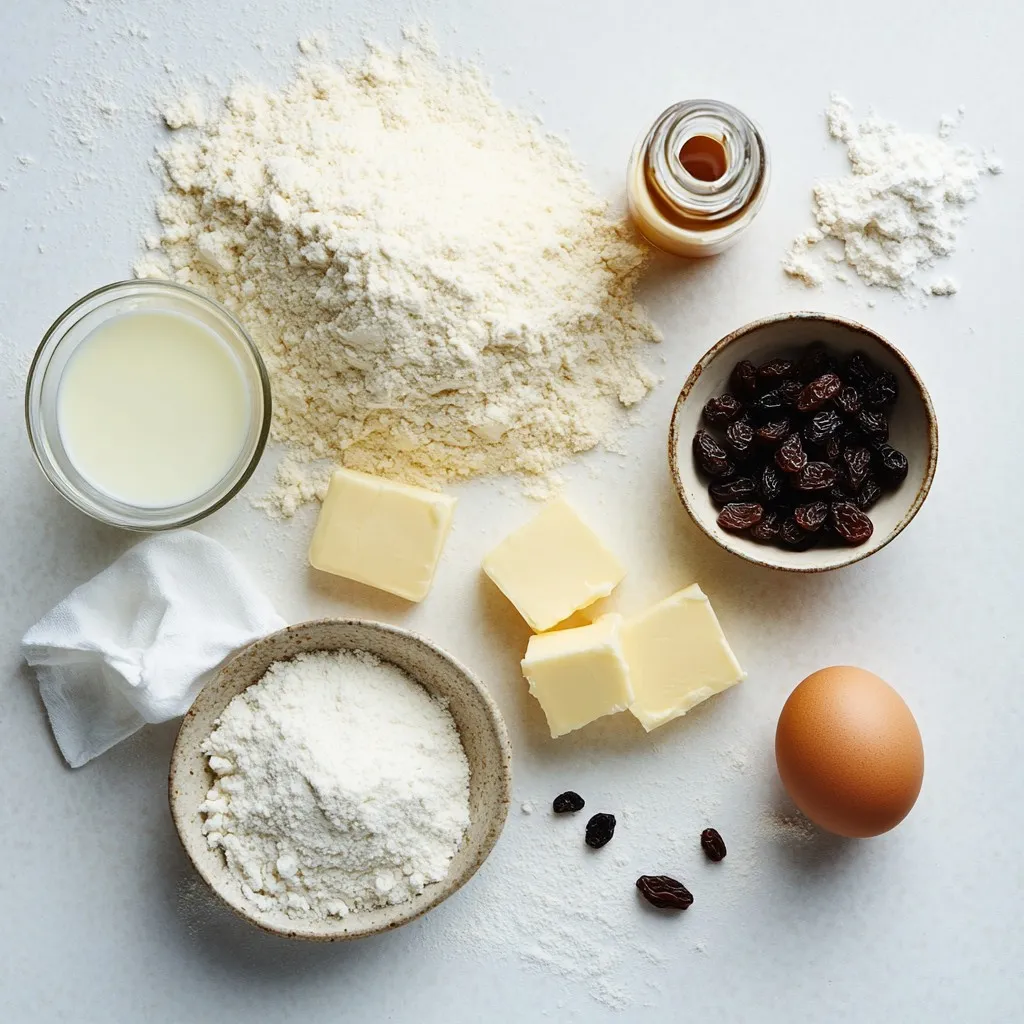
To make The Queen’s English Scones, you need a few simple items. Here’s the list:
– 2 cups all-purpose flour
– 1/4 cup granulated sugar
– 1 tablespoon baking powder
– 1/4 teaspoon salt
– 1/4 cup unsalted butter, chilled and cubed
– 3/4 cup whole milk
– 1 large egg
– 1 teaspoon vanilla extract
– 1/2 cup raisins or currants (optional)
– Extra flour for dusting
Each ingredient plays a key role in making scones soft and tasty. The flour gives structure, while the butter adds rich flavor. Sugar gives a hint of sweetness. Baking powder helps the scones rise and become fluffy.
The milk and egg combine to create moisture, making the dough workable. Vanilla extract adds a warm aroma. If you like, you can include raisins or currants for a fruity touch. Don’t forget to dust your surface with extra flour to prevent sticking.
This list is short and easy to find. Gather these ingredients, and you are ready to bake some delightful scones!
Step-by-Step Instructions
Preparation Steps
1. Preheat the oven and prepare baking sheet
Start by setting your oven to 400°F (200°C). Line a baking sheet with parchment paper.
2. Combine dry ingredients
In a large bowl, whisk together 2 cups of flour, 1/4 cup of sugar, 1 tablespoon of baking powder, and 1/4 teaspoon of salt until mixed well.
3. Incorporate the butter
Add 1/4 cup of chilled, cubed butter to the dry mix. Use your fingers or a pastry cutter to rub the butter into the flour. You want it to look like coarse crumbs.
4. Mix wet ingredients
In another bowl, whisk together 3/4 cup of milk, 1 large egg, and 1 teaspoon of vanilla extract. If you like, mix in 1/2 cup of raisins or currants.
Forming and Baking the Scones
1. Combining wet and dry ingredients
Pour the wet mix into the dry ingredients. Stir gently until just combined. The dough should feel slightly sticky but manageable.
2. Kneading and rolling the dough
Lightly sprinkle flour on a clean surface. Turn the dough out and knead it gently for about 1 minute. Roll the dough to about 1-inch thick.
3. Cutting out the scones
Use a round cutter, about 2.5 inches wide, to cut out your scones. Place them on the prepared baking sheet. Gather any dough scraps, knead, and cut out more scones.
4. Baking times and tips
Bake the scones for 15 to 20 minutes. They should turn golden brown on top. Let them cool slightly on a wire rack before serving.
Tips & Tricks
Perfecting the Scone Texture
– Avoiding overmixing: When you mix the dough, do it gently. If you mix too much, the scones can turn out tough. You want a light and fluffy texture. Stop mixing when you see no dry flour.
– Handling the dough properly: After mixing, turn the dough out onto a floured surface. Knead it just enough to bring it together, about one minute. Too much kneading will make your scones dense.
Serving Suggestions
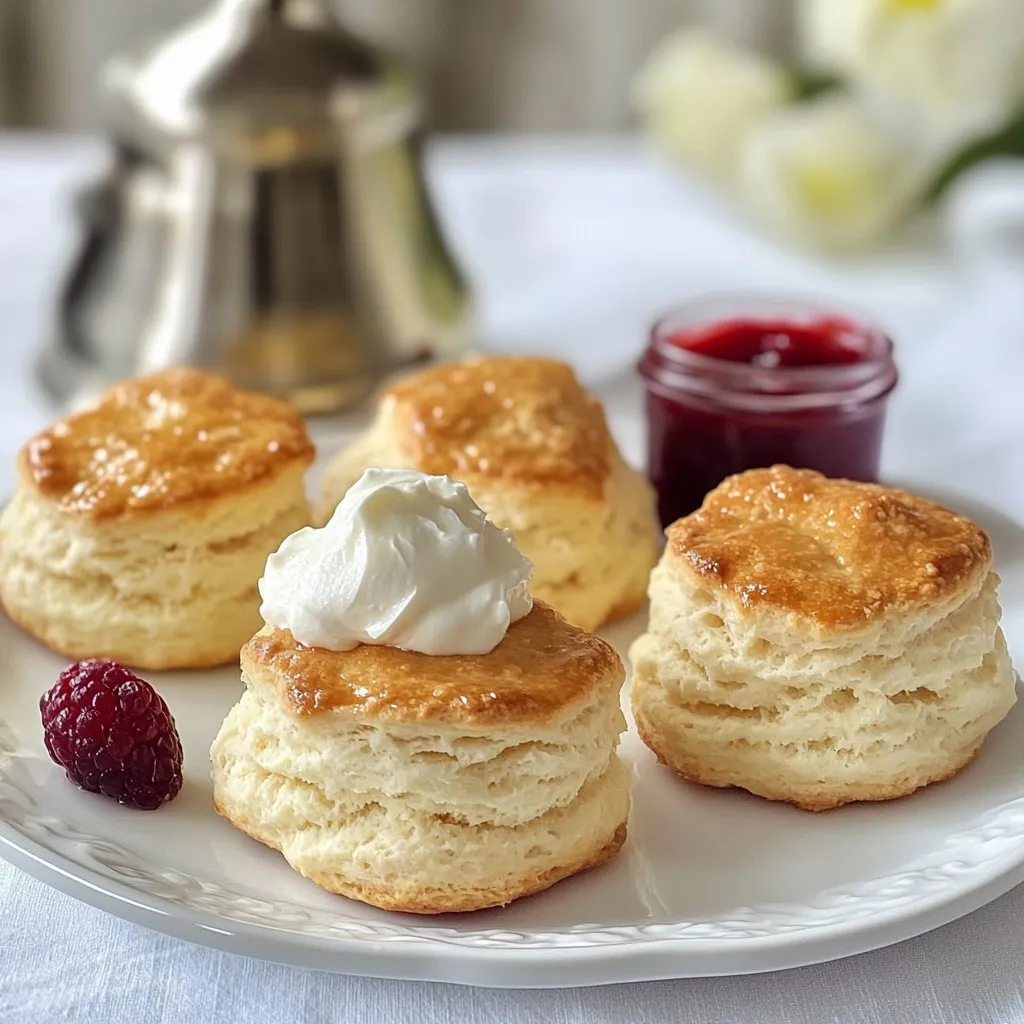
– Best accompaniments: Serve your scones warm. They pair best with clotted cream and your favorite jam. The cream adds richness, while the jam gives a sweet touch.
– Garnishing ideas: For a fancy look, add fresh berries on top. Strawberries, raspberries, or blueberries work great. They add color and freshness to the plate.
Storage Tips
– How to store leftover scones: If you have any scones left, let them cool first. Then place them in an airtight container. They stay fresh for up to two days at room temperature.
– Reheating instructions: To reheat, place the scones in a warm oven for about five minutes. This will make them soft again. You can also microwave them for a few seconds, but watch closely to avoid drying them out.
Pro Tips
- Use Chilled Ingredients: Ensure your butter and milk are cold to create a flaky texture in the scones.
- Don’t Overwork the Dough: Mix the ingredients until just combined to prevent tough scones; a little stickiness is fine.
- Experiment with Add-ins: Try different dried fruits, nuts, or even chocolate chips for unique flavor variations.
- Brush for Shine: For a beautiful finish, brush the tops of the scones with a bit of milk or beaten egg before baking.
Variations
Flavor Variations
You can make scones even more fun by adding different flavors. Try adding dried fruits like cranberries or apricots. These fruits add a sweet burst to each bite. You can mix them in with the wet ingredients.
You can also use spices for more depth. Adding a dash of cinnamon or nutmeg can change the whole flavor. These spices can warm up the scone and give it a cozy feel. Experimenting with flavors makes each batch unique and exciting.
Dietary Variations
If you need gluten-free options, you can swap the all-purpose flour with a gluten-free blend. Look for a blend that has xanthan gum. This helps mimic the texture of regular flour. Just follow the same steps in the recipe.
For vegan alternatives, replace the butter with coconut oil or vegan butter. Use plant-based milk instead of whole milk. You can also skip the egg by using a flaxseed egg. Mix one tablespoon of ground flaxseed with three tablespoons of water. Let it sit for a few minutes before adding it to your mix. These changes allow everyone to enjoy scones!
Historical Background
Significance of English Scones
Scones have a rich history in British culture. They first appeared in the early 19th century. They became popular during afternoon tea. This tradition offers a lovely break in the day. It allows people to enjoy tea with friends and family.
Queen Elizabeth II loved scones. They were a staple at royal events. The Queen often enjoyed them with jam and clotted cream. This simple treat became a symbol of British hospitality. Scones link us to tradition and simplicity. They remind us of cozy afternoons spent with loved ones.
Traditional vs. Modern Variations
Traditional scones are made with basic ingredients. They include flour, sugar, butter, milk, and baking powder. The classic recipe is simple yet rewarding.
Modern twists on scones have emerged. Cooks now add fun flavors and ingredients. You can find scones with chocolate chips, fruits, or even herbs. These variations keep scones fresh and exciting. They invite creativity into the kitchen.
Despite new flavors, the heart of the scone stays the same. The texture should be light and fluffy, with a golden crust. Whether you choose classic or modern, scones remain a delightful treat.
FAQs
What is the secret to fluffy scones?
The secret to fluffy scones lies in the mixing. You want to mix just enough. Overmixing makes them tough. Use cold butter and keep the dough light. This helps the scones rise well.
Can I make the dough ahead of time?
Yes, you can make the dough ahead of time. After mixing, wrap it tightly in plastic. Chill it in the fridge for up to 24 hours. When ready to bake, roll and cut them as usual.
How do you know when scones are done?
You know scones are done when they are golden brown on top. They should also feel firm to the touch. A toothpick should come out clean from the center.
What to do if my scone dough is too sticky?
If your scone dough is too sticky, add a little more flour. Dust your hands and work surface lightly. Be gentle to avoid tough scones. You want a soft, but manageable dough.
You now have a complete guide to making delicious scones. From selecting the right ingredients to using simple steps, you can create soft and tasty treats. Remember to avoid overmixing for the best texture and experiment with flavors. Enjoy your scones with clotted cream, jam, or fresh berries. With practice, you’ll master these classic delights. Embrace the fun of baking and share your tasty results with others. Happy bakin