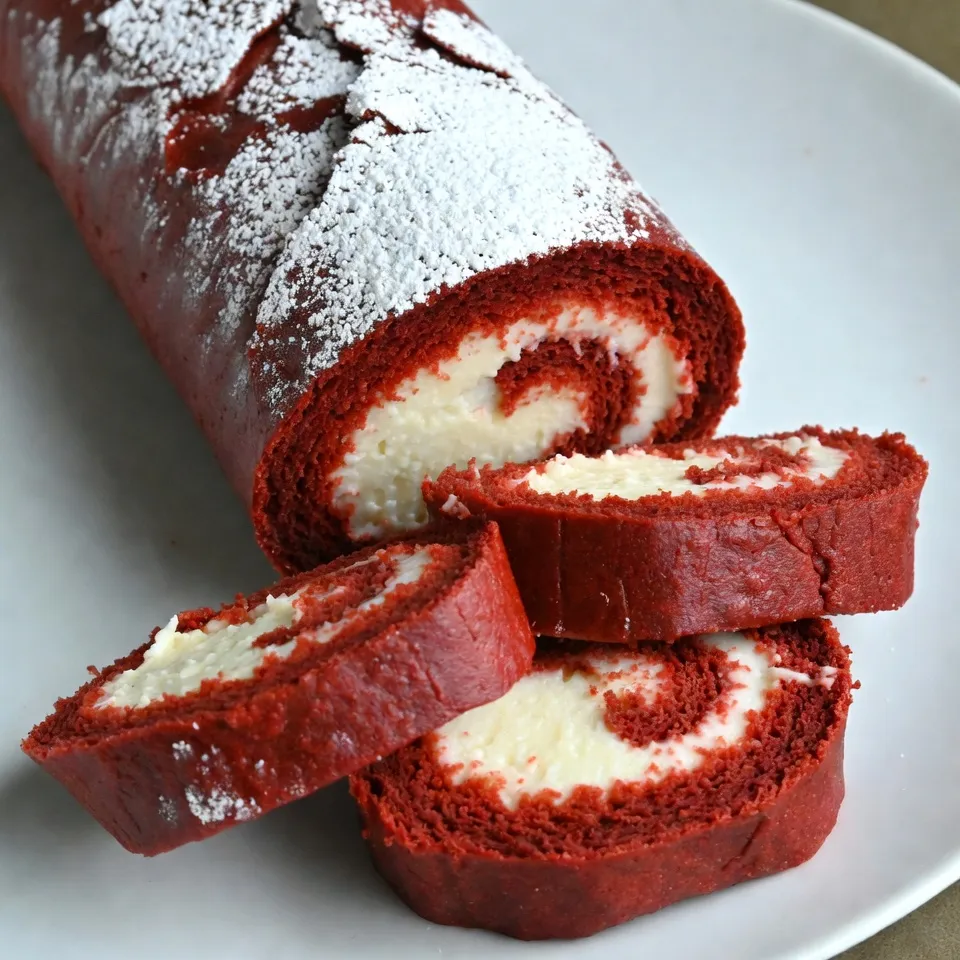
Get ready to bake a showstopper with my Red Velvet Cake Roll with Cream Cheese Delight! This fun twist on a classic dessert combines fluffy red velvet cake and rich cream cheese filling. I’ll guide you step-by-step through ingredients, tips, and tricks to make your cake roll perfect every time. Whether you’re a beginner or an expert, this recipe will wow your friends and family with its vibrant color and delicious taste!
Why I Love This Recipe
- Beautiful Presentation: This cake roll has a stunning red color that makes it a showstopper at any event.
- Delicious Cream Cheese Filling: The creamy and tangy filling perfectly complements the rich chocolate flavor of the cake.
- Fun to Make: Rolling the cake adds a fun twist to traditional cake baking and makes for an exciting kitchen activity.
- Perfect for Any Occasion: This cake roll is versatile enough to be served at birthdays, holidays, or just because!
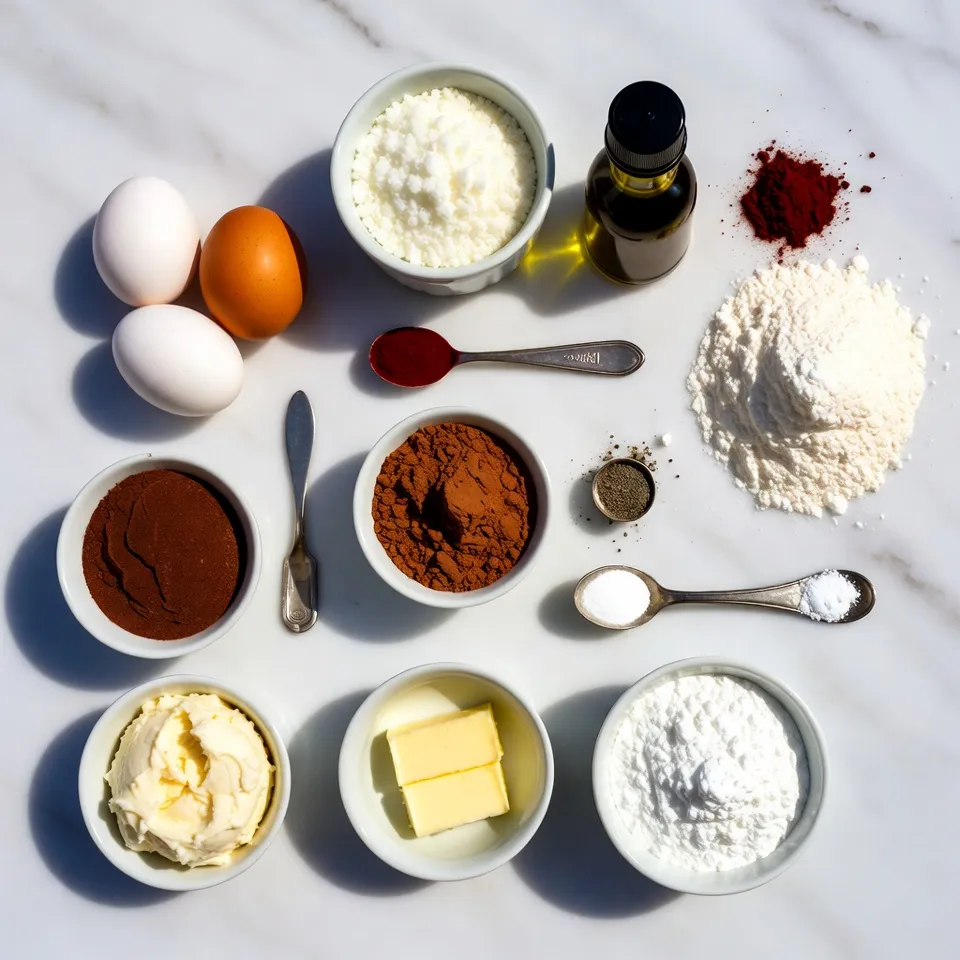
Ingredients
List of Ingredients
– 3 large eggs, at room temperature
– 1 cup granulated sugar
– 1 teaspoon vanilla extract
– 1 tablespoon red food coloring
– 2/3 cup all-purpose flour
– 1/4 cup unsweetened cocoa powder
– 1 teaspoon baking powder
– 1/2 teaspoon baking soda
– 1/4 teaspoon salt
– Powdered sugar, for dusting
– 8 oz cream cheese, softened
– 1/2 cup unsalted butter, softened
– 2 cups powdered sugar (plus more if needed)
– 1 teaspoon vanilla extract (for frosting)
Description of Each Ingredient
Eggs are key for structure. They help the cake rise and stay fluffy. Make sure they are at room temperature. This helps them mix better. Sugar adds sweetness and helps with moisture. The vanilla extract gives a warm flavor. Red food coloring makes the cake beautiful.
All-purpose flour provides structure. Cocoa powder is important for that rich chocolate taste. Baking powder and baking soda are leavening agents. They help the cake rise. Salt balances the sweetness and enhances flavor.
For the cream cheese filling, use softened cream cheese and unsalted butter. These create a rich, creamy texture. Powdered sugar sweetens and thickens the filling.
Suggested Brands or Alternatives
For cream cheese, I recommend brands like Philadelphia or Neufchâtel. They provide a great taste. If you want a lower-sugar option, try Stevia or coconut sugar for granulated sugar. For powdered sugar, any brand works well. Just make sure it’s fresh for the best results.
Step-by-Step Instructions
Detailed Instructions for Each Step
1. Preheat the Oven: Start by preheating your oven to 350°F (175°C). This will help your cake bake evenly. Line a 15×10-inch jelly roll pan with parchment paper, leaving some paper hanging over the edges. This makes it easy to lift the cake later.
2. Prepare the Batter: In a mixing bowl, beat 3 large eggs with 1 cup of granulated sugar. Mix until the mixture is light and fluffy, which takes about 2-3 minutes. Next, add 1 teaspoon of vanilla extract and 1 tablespoon of red food coloring. Mix until everything is well combined.
3. Combine Dry Ingredients: In a different bowl, whisk together 2/3 cup of all-purpose flour, 1/4 cup of unsweetened cocoa powder, 1 teaspoon of baking powder, 1/2 teaspoon of baking soda, and 1/4 teaspoon of salt. Gradually fold this dry mix into the wet mixture until smooth.
4. Bake the Cake: Pour the batter into your prepared jelly roll pan. Spread it evenly to the edges. Bake for 12-15 minutes, or until a toothpick inserted in the center comes out clean.
5. Cool the Cake: Once baked, take the cake out of the oven. Let it cool for about 10 minutes. Dust a clean kitchen towel with powdered sugar. Carefully flip the cake onto the towel, removing the parchment paper. Roll the cake up from the short side with the towel inside. Let it cool completely.
6. Make the Cream Cheese Filling: In a new bowl, beat together 8 oz of softened cream cheese and 1/2 cup of unsalted butter until smooth. Gradually add 2 cups of powdered sugar and 1 teaspoon of vanilla extract. Mix until the filling is fluffy and well combined.
7. Assemble the Cake Roll: Once the cake is cool, gently unroll it. Spread the cream cheese filling evenly across the cake using an offset spatula. Roll the cake back up without the towel. Place it seam-side down on a serving plate.
8. Chill and Serve: Refrigerate the cake roll for at least 30 minutes. This helps it set. Once chilled, slice it into pieces and serve. Dust with more powdered sugar if you like.
Common Mistakes to Avoid During Preparation
– Overmixing: Mix just until combined. Overmixing can make the cake tough.
– Not Cooling Properly: Allow the cake to cool enough before rolling. This prevents cracking.
– Skipping the Towel: The towel helps you roll the cake easily. Don’t skip this step!
– Not Dusting with Powdered Sugar: This prevents the cake from sticking to the towel.
Visual Guides for Each Key Step
For visual guides that show you the key steps, check out these links:
– [Mixing the Batter](#)
– [Rolling the Cake](#)
– [Frosting the Cake](#)
– [Final Presentation](#)
With these steps, you will create a beautiful Red Velvet Cake Roll with Cream Cheese. Enjoy the process and the delicious results!
Tips & Tricks
Expert Tips for Achieving the Best Results
To get a moist cake, use room-temperature eggs. This helps mix the batter smoothly. When mixing, don’t overbeat the eggs. This keeps the cake light and airy. After baking, cool the cake for about 10 minutes. Then, flip it onto a powdered-sugar-dusted towel. Roll it while it’s warm to avoid cracks. Let it cool fully in the rolled shape.
Tools and Equipment Suggestions
For this recipe, use a 15×10-inch jelly roll pan. It’s the perfect size for even baking. A hand mixer or stand mixer works best for the batter. An offset spatula is great for spreading the cream cheese filling. Have some parchment paper on hand. It makes transferring the cake easy.
Serving Suggestions
Pair this cake roll with coffee or tea. The rich flavors balance well with these drinks. For presentation, slice the roll into even pieces. Dust each piece with powdered sugar before serving. Add fresh berries or mint leaves for a pop of color.
Pro Tips
- Room Temperature Ingredients: Ensure your eggs and cream cheese are at room temperature for a smoother batter and filling. This helps to achieve a light and fluffy texture.
- Dusting with Powdered Sugar: Dust the kitchen towel with powdered sugar before rolling the cake. This prevents sticking and adds a nice touch of sweetness.
- Chill Before Serving: Allow the cake roll to chill for at least 30 minutes after assembling. This helps the filling to set and makes slicing easier.
- Decorative Touch: For an elegant finish, drizzle melted chocolate over the chilled cake roll before serving. This adds flavor and visual appeal!
Variations
Flavor Variations
You can change the cream cheese filling to mix things up. Try adding lemon zest for a citrus twist. A touch of almond extract gives a nice flavor. You can also try flavored cream cheeses, like strawberry or chocolate. For the cake itself, swap red food coloring for matcha or cocoa powder for a different look and taste.
Dietary Variations
If you need gluten-free options, use a gluten-free flour blend. For a dairy-free version, choose a non-dairy cream cheese. You can also make it vegan by using flax eggs instead of real eggs. For the frosting, look for vegan butter and powdered sugar to keep it plant-based.
Seasonal Variations
Decorate your cake roll for the season! For Halloween, add black and orange sprinkles. For Christmas, use crushed peppermint or edible glitter. For birthdays, colorful sprinkles and fun candles can brighten it up. You can even shape the roll into a log for a rustic look during the holidays.
Storage Info
Best Practices for Storing Cake Rolls
To keep your red velvet cake roll fresh, wrap it well. Use plastic wrap or foil. This helps keep moisture in. Store it in the fridge if you plan to eat it within a week. For longer storage, place it in the freezer. Just make sure to wrap it tightly. You can also put it in an airtight container. This will help avoid freezer burn.
Shelf Life of the Cake Roll
When stored properly, the cake roll lasts up to one week in the fridge. In the freezer, it can last up to three months. Just remember, the sooner you eat it, the better it tastes. Quality is best when fresh.
Reheating Tips
If you want to enjoy the cake roll warm, reheat it gently. Use the microwave on low power. Heat for about 10-15 seconds. Check to make sure it doesn’t dry out. You can also place it in a warm oven for a few minutes. This helps keep the cake moist and soft. Enjoy your tasty treat!
FAQs
Can I make this cake roll in advance?
Yes, you can prepare this cake roll ahead of time. To store it, wrap it tightly in plastic wrap after chilling. Place it in the fridge for up to three days. If you want to keep it longer, freeze it for up to two months. Just remember to thaw it in the fridge overnight before serving.
What can I substitute for cream cheese?
If you need a substitute for cream cheese, consider using mascarpone. It has a similar texture and flavor. For a non-dairy option, use vegan cream cheese. Another choice is blended silken tofu mixed with a bit of lemon juice for tanginess. Check the flavors, as some substitutes might change the cake’s taste.
How do I prevent the cake from cracking?
To avoid cracks, roll your cake while it’s still warm. Use a clean kitchen towel dusted with powdered sugar. Roll the cake from the short side gently but firmly. Let it cool completely in the rolled shape. This helps maintain its form and prevents cracks when you unroll it later.
This post covered everything you need for a perfect cake roll. We talked about the key ingredients, detailed steps, and common mistakes to avoid. I shared expert tips for the best results and various ways to change up flavors or make it fit your diet. Don’t forget proper storage for lasting taste. With these insights, you can bake confidently and wow everyone with your skills. Enjoy creating and sharing your delicious cake roll