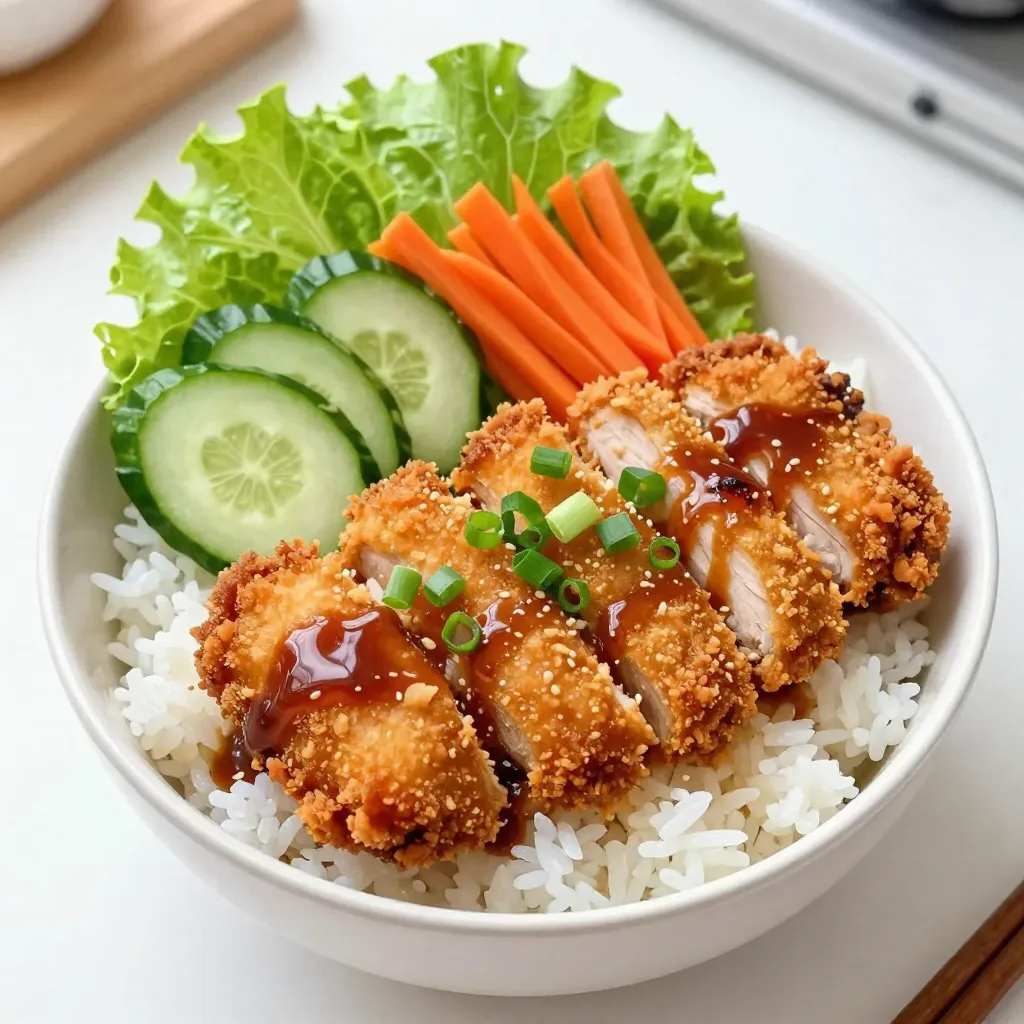
Ready to dive into the world of Japanese Katsu Rice Bowls? This flavorful and easy recipe will have your taste buds dancing! With crispy chicken, tender rice, and delicious sauces, you’ll impress family and friends in no time. I’ll guide you through each step, from selecting the right ingredients to perfecting your katsu. Let’s whip up a bowl of comfort that’s both tasty and satisfying. Get your aprons on, and let’s get cooking!
Why I Love This Recipe
- Quick and Easy: This recipe is perfect for busy weeknights, taking only 15 minutes to prep and 20 minutes to cook.
- Crispy Texture: The panko breadcrumbs create an irresistibly crispy coating on the chicken, making each bite satisfying.
- Flavorful Ingredients: The combination of soy sauce, sesame oil, and tonkatsu sauce adds depth and richness to the dish.
- Customizable Bowls: You can easily personalize the rice bowls with your favorite vegetables or toppings for a unique touch.
Ingredients
List of Key Ingredients
– 2 boneless chicken thighs
– 1 cup panko breadcrumbs
– 1/2 cup all-purpose flour
– 1 large egg, beaten
– 1 cup cooked sushi rice
– 1/4 cup tonkatsu sauce
– 2 tablespoons soy sauce
– 1 teaspoon sesame oil
– 1/2 cucumber, thinly sliced
– 1 carrot, julienned
– 2 green onions, chopped
– Salt and pepper to taste
– Lettuce leaves for garnish
– Oil for frying
The key to a great katsu rice bowl lies in the ingredients. You start with chicken thighs. They stay juicy and tender. Next, you need panko breadcrumbs. They create a light, crispy crust. Flour helps the egg stick to the chicken. The egg makes the breading adhere.
Flavor is essential, so we add soy sauce and sesame oil. These give the rice a savory kick. Fresh veggies like cucumber and carrot add crunch and color. Green onions bring a fresh taste.
Finally, you’ll need cooking oil for frying. Choose a neutral oil, like canola or vegetable oil. This allows the chicken’s flavor to shine.
With these ingredients, you’re ready to make a delicious katsu rice bowl. Each component plays a part in creating a dish that is both flavorful and satisfying. Enjoy the process and the tasty results!

Step-by-Step Instructions
Preparing the Chicken
First, you want to prepare the chicken thighs. Place them between two sheets of plastic wrap. Use a meat mallet or rolling pin to pound them to an even thickness, about 1/2 inch thick. This step helps them cook evenly. After that, season both sides with salt and pepper. This simple seasoning boosts the flavor of the chicken.
Breading the Chicken
Next, set up your breading station. You need three shallow bowls: one for flour, one for the beaten egg, and one for panko breadcrumbs. Start by dipping each chicken thigh into the flour. Make sure to coat it well. Then, move it to the beaten egg, letting any excess drip off. Finally, press it into the panko breadcrumbs. Make sure to cover it completely. This will give your katsu that nice, crispy texture.
Cooking the Katsu
Now it’s time to cook the katsu. In a large skillet, heat about 1/4 inch of oil over medium heat. You want the oil hot but not smoking. Carefully place the breaded chicken into the skillet. Cook for about 4-5 minutes on each side. You’re looking for a golden brown color. Once cooked, remove the chicken and drain it on paper towels. This step helps remove excess oil.
Preparing the Sushi Rice
While the chicken cooks, prepare the sushi rice. In a bowl, gently flavor the cooked rice with a mix of soy sauce and sesame oil. Stir it well to combine. This adds a nice umami taste to the rice, making it the perfect base for your bowl.
Assembling the Rice Bowls
To assemble your rice bowls, start by dividing the seasoned sushi rice among serving bowls. Top each bowl with sliced katsu chicken. Add thinly sliced cucumber and julienned carrot for crunch and color. Sprinkle chopped green onions on top for a fresh finish. Finally, drizzle each bowl with tonkatsu sauce. Garnish with lettuce leaves on the side for added texture. Enjoy your delicious katsu rice bowls!
Tips & Tricks
Achieving Crispy Katsu
To make your katsu crispy, heat your oil well before frying. The oil should be hot enough to bubble when you add the chicken. This helps create a golden crust. Use panko breadcrumbs instead of regular breadcrumbs. Panko gives a light, airy crunch that you will love.
Flavor Enhancements
You can add extra flavor with sauces like sweet chili or sriracha. These sauces bring a nice kick to your dish. Try serving your katsu over fresh vegetables, like shredded cabbage or baby spinach. This adds color and crunch to your bowl.
Common Mistakes to Avoid
Avoid overcrowding the pan while frying. This can lead to soggy katsu. Fry in batches if needed. Also, don’t forget to season your chicken well. A little salt and pepper make a big difference in taste.
Pro Tips
- Choose the Right Chicken: Opt for boneless chicken thighs for juiciness and flavor; they stay moist during frying compared to chicken breasts.
- Keep Oil Temperature Steady: Ensure the oil is hot enough (around 350°F/175°C) before frying to achieve that perfect crispy texture.
- Press the Panko: When coating the chicken with panko, press it firmly to help the crumbs adhere better, resulting in a crunchier katsu.
- Garnish for Freshness: Adding fresh vegetables like cucumber and lettuce not only enhances the dish’s presentation but also adds a nice crunch and balance to the meal.
Variations
Alternative Proteins
You can swap chicken for pork if you like. For pork katsu, use boneless pork chops. Follow the same steps as chicken. Pound the pork to an even thickness. Season it with salt and pepper. Then, bread it just like the chicken. Fry until golden brown.
If you want a vegetarian option, try vegetable katsu. Use firm tofu or a mix of veggies like eggplant and zucchini. Slice them into strips. Coat them in flour, egg, and panko. Fry until crispy. This gives you a tasty, meat-free meal.
Rice Alternatives
While sushi rice is classic, you can try other types. Jasmine rice or short-grain rice works well too. They give a nice texture. You can also use brown rice for a healthier choice. It pairs well with the katsu.
For a low-carb option, consider quinoa or cauliflower rice. Quinoa adds protein and a nutty flavor. Cauliflower rice is light and fluffy. Just sauté it lightly before serving. Both options are great for those watching carbs.
Sauce Variations
Tonkatsu sauce is a must, but you can make it at home. Mix ketchup, Worcestershire sauce, and a little soy sauce. Add a bit of sugar to balance the flavors. This homemade version is quick and tasty.
You can also explore other sauces. Try a spicy mayo or a teriyaki glaze for a twist. Each adds a unique taste, changing the whole dish. Don’t be afraid to mix flavors and find your favorite!
Storage Info
Storing Leftovers
To keep your katsu rice bowls fresh, refrigerate leftovers within two hours. Store the chicken and rice in airtight containers. This way, they stay tasty for up to three days. Keep the vegetables separate to keep them crisp.
Reheating Tips
When it’s time to enjoy your leftovers, you can reheat the chicken katsu in several ways. For best results, use an oven. Preheat it to 350°F (175°C). Place the chicken on a baking sheet for about 10-15 minutes. This keeps it crispy. You can also use a microwave. Heat on medium for 1-2 minutes, but expect a softer texture.
Freezing Katsu Rice Bowls
You can freeze katsu rice bowls to enjoy later. First, let everything cool completely. Store the chicken, rice, and veggies in separate bags or containers. This helps keep flavors fresh. When ready to eat, thaw in the fridge overnight and reheat as mentioned above. This way, you can enjoy your delicious katsu at any time!
FAQs
What is the best way to ensure the katsu stays crispy?
To keep the katsu crispy, use panko breadcrumbs. They are light and crunchy. Fry the chicken in hot oil, about 350°F (175°C). Make sure not to overcrowd the pan. If the oil cools down, the katsu will absorb it and get soggy. After frying, let the katsu drain on paper towels to remove excess oil.
Can I use a different type of vinegar in the sauce?
Yes, you can! While traditional tonkatsu sauce does not use vinegar, you can add a splash of rice vinegar for a tangy twist. Apple cider vinegar also works well. Each vinegar adds a unique flavor but stay light with the amount you use.
How can I adjust the recipe for larger servings?
To serve more people, simply double or triple the ingredients. For each chicken thigh, use the same amount of flour, egg, and panko. Make sure to fry the chicken in batches to keep the oil temperature stable. This way, each piece cooks evenly and stays crispy.
What are traditional sides to serve with Katsu Rice Bowls?
Common sides include pickled vegetables, like pickled daikon or cucumber. A simple salad with lettuce and sesame dressing also works well. Miso soup can balance the meal nicely. You could serve steamed broccoli or edamame for added nutrition and color.
Making katsu rice bowls is simple and fun. We learned about key ingredients, like chicken thighs and panko breadcrumbs. The step-by-step instructions help you prepare, bread, and cook the chicken. Tips and tricks show how to get that perfect, crispy texture and avoid common mistakes. Variations offer options for different proteins and rice types, so you can customize your meal. Finally, storage tips ensure nothing goes to waste.
Enjoy crafting your own delicious katsu rice bowls! You’ll impress family and friends with every bit