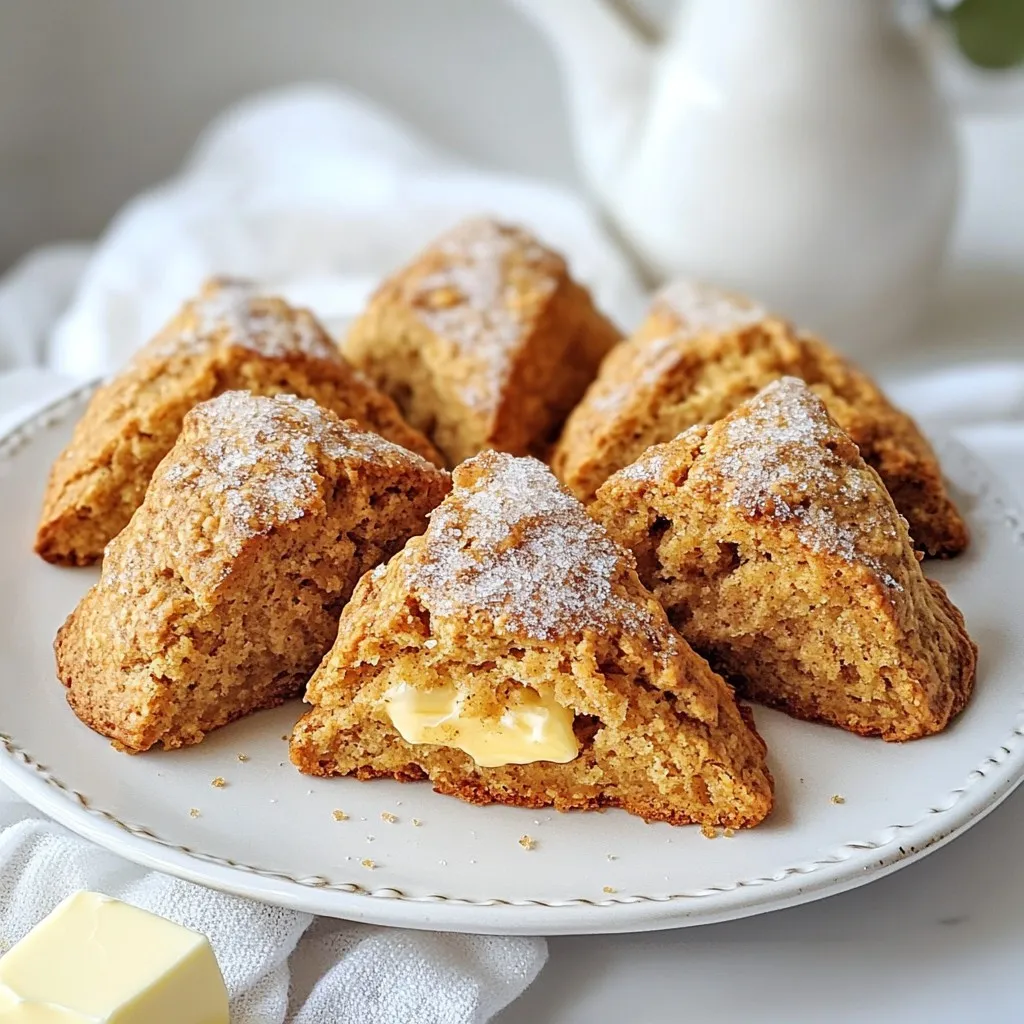
Get ready to fill your home with the delightful scent of gingerbread! In this blog, I’ll share my recipe for Gingerbread Scones that are both festive and flavorful. You’ll discover the essential and optional ingredients you need, easy step-by-step instructions, and tips for perfecting these treats. Whether for a holiday gathering or a cozy morning, these scones will impress. Let’s get baking!
Why I Love This Recipe
- Festive Flavors: The warm spices of ginger, cinnamon, and nutmeg create a delightful holiday aroma that fills your kitchen.
- Easy to Make: This scone recipe comes together quickly, making it a perfect choice for busy holiday mornings.
- Versatile Treat: Enjoy these scones plain, or serve them with butter, jam, or even cream cheese for a delicious twist.
- Impressive Presentation: These scones not only taste amazing, but they also look beautiful on a festive platter, making them a great addition to any holiday gathering.
Ingredients
Essential Ingredients for Gingerbread Scones
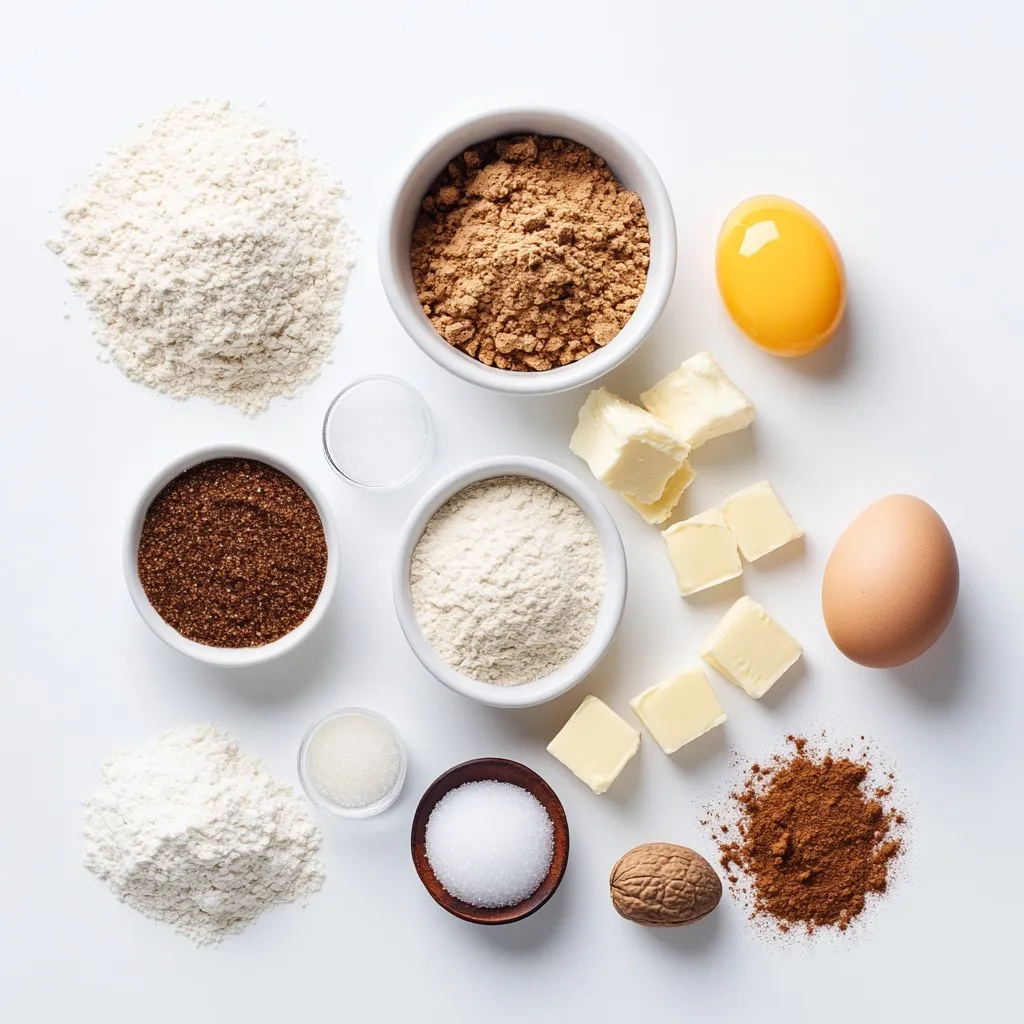
– 2 cups all-purpose flour
– 1/3 cup brown sugar
– 2 teaspoons baking powder
– 1 teaspoon ground ginger
– 1 teaspoon ground cinnamon
– 1/2 teaspoon ground nutmeg
– 1/2 teaspoon salt
– 1/2 cup unsalted butter, chilled and cubed
– 1/2 cup molasses
– 1/3 cup heavy cream
– 1 large egg
– 1 teaspoon vanilla extract
To make gingerbread scones, you need a few key items. First, all-purpose flour acts as the base. It gives these scones a nice structure. Brown sugar adds sweetness and a hint of caramel flavor. Baking powder helps the scones rise, making them light and fluffy.
Ground ginger, cinnamon, and nutmeg bring all the warm, cozy flavors of gingerbread. Salt enhances the sweetness and balances the spices. Chilled, cubed butter makes the scones tender.
Molasses gives them that rich, deep flavor. Heavy cream adds moisture and richness. A large egg binds the ingredients together. Finally, vanilla extract rounds out the flavors nicely.
Optional Ingredients
– Turbinado sugar for sprinkling
– Additional flavorings
You can also add turbinado sugar on top for a sweet crunch. It gives a nice touch to the final look. If you want to boost the flavor, consider adding other spices like cloves or allspice. You could even mix in chocolate chips or nuts for extra texture.
These optional ingredients can take your scones to the next level. Feel free to experiment until you find your favorite blend.
Step-by-Step Instructions
Preparation Steps
1. Preheat your oven to 400°F (200°C). Line a baking sheet with parchment paper.
2. In a large bowl, whisk together the dry ingredients. Combine 2 cups flour, 1/3 cup brown sugar, 2 teaspoons baking powder, 1 teaspoon ground ginger, 1 teaspoon ground cinnamon, 1/2 teaspoon ground nutmeg, and 1/2 teaspoon salt. This mix gives the scones their lovely gingerbread flavor.
Mixing Techniques
3. Add 1/2 cup chilled and cubed unsalted butter to the dry mix. Use a pastry cutter or your fingers to work the butter into the flour. Stop when it looks like coarse crumbs. This step is key for flaky scones.
4. In another bowl, mix together 1/2 cup molasses, 1/3 cup heavy cream, 1 large egg, and 1 teaspoon vanilla extract until smooth.
5. Pour the wet ingredients into the dry mix. Stir gently until just combined. Be careful not to over-mix, as this can make the scones tough.
Shaping and Baking
6. Turn the dough onto a lightly floured surface. Knead it gently a few times until it holds together. Pat it into a circle about 1-inch thick.
7. Cut the dough into wedges or use a round cutter to make scones. Place them on the baking sheet.
8. Brush the tops with a little extra heavy cream and sprinkle with turbinado sugar for a sweet crunch.
9. Bake for 15-18 minutes. They should be golden brown and cooked through.
10. Remove the scones from the oven and let them cool slightly. Then, transfer them to a wire rack.
These steps create perfect gingerbread scones, ready to enjoy!
Tips & Tricks
Avoiding Over-Mixing
Mixing gently is key to great scones. When you combine wet and dry ingredients, do it slowly. Over-mixing can make your scones tough. You want them light and fluffy. Stir until just combined, then stop. This way, you keep that perfect texture.
Tips for Fluffier Scones
To make your scones fluffier, use cold butter. Chilled butter creates steam while baking. This steam helps the scones rise. Also, avoid pressing the dough too hard when kneading. A gentle touch keeps air pockets inside. You can also add a bit more baking powder for extra lift.
Serving Suggestions
Serve gingerbread scones warm for the best taste. Pair them with a pat of butter or your favorite jam. For a festive touch, arrange them on a pretty platter. Sprinkle extra spices on top or add fresh cranberries. This makes your scones look as good as they taste!
Pro Tips
- Use Chilled Ingredients: Ensure your butter and cream are cold. This helps achieve flaky and tender scones.
- Don’t Over-Mix: When combining wet and dry ingredients, mix just until incorporated to maintain a light texture.
- Cut Scones Evenly: For uniform baking, use a sharp knife or a round cutter to cut the scones into equal sizes.
- Experiment with Spices: Feel free to adjust the spices or add extras like cloves or allspice for a unique flavor twist.
Variations
Flavor Enhancements
You can make gingerbread scones even better! Try adding more spices like allspice or cloves. A pinch of nutmeg adds warmth, too. For a fun twist, mix in chocolate chips or chopped nuts. Pecans or walnuts give a nice crunch and richness.
Gluten-Free Options
If you need a gluten-free version, use a gluten-free flour blend. Look for one that has xanthan gum, as it helps with texture. You can also use almond flour or coconut flour, but you may need to adjust the liquid in the recipe.
Seasonal Twists
Make your gingerbread scones festive for the holidays! Add dried cranberries or candied ginger for a fruity burst. You can also glaze the scones with a simple icing made of powdered sugar and water. For a fun touch, shape the dough into holiday-themed forms like stars or trees.
Storage Info
Storing Leftover Scones
To keep your gingerbread scones fresh, store them in an airtight container. This helps prevent them from drying out. Place a piece of parchment paper between layers if you stack them. Avoid stacking them directly on top of each other, as this can cause them to lose their shape.
Freezing Instructions
Freezing gingerbread scones is easy and a great way to save some for later. First, let the scones cool completely after baking. Wrap each scone tightly in plastic wrap. Then, place them in a freezer-safe bag or container. When you want to enjoy them, simply take out a scone and let it thaw at room temperature. You can reheat them in an oven at 350°F (175°C) for about 5-10 minutes for a warm treat.
Shelf Life
When stored properly, gingerbread scones last for about 2-3 days at room temperature. If frozen, they can keep well for up to 3 months. However, for the best taste and texture, aim to eat them within the first month of freezing. Enjoying them fresh will provide the best flavor and experience.
FAQs
Can I use different types of flour?
Yes, you can use other flours. Here are some options:
– Whole wheat flour adds more fiber.
– Almond flour gives a nutty taste.
– Gluten-free flour blends work well for gluten-free diets.
Remember, using different flours may change the texture. You might need to adjust the liquid too.
How do I know when the scones are fully baked?
Check for a golden color on the tops. The edges should feel firm. You can also use a toothpick. Insert it into the center; it should come out clean. If there’s wet dough, bake a bit longer.
Can I make these scones ahead of time?
Yes, you can prepare the dough ahead. Shape the scones and freeze them. When ready, bake them straight from the freezer. Just add a few extra minutes to the baking time. This way, you have fresh scones any time!
In this post, we explored how to make delightful gingerbread scones. We covered essential ingredients, step-by-step instructions, and tips for perfecting your bake. I shared ways to enhance flavor and offered storage tips to keep your scones fresh.
Baking these scones adds joy to your kitchen. Experiment with flavors and enjoy every bite. With these simple steps, you can create tasty treats for any occasion. Now, get baking and enjoy your time in the kitche