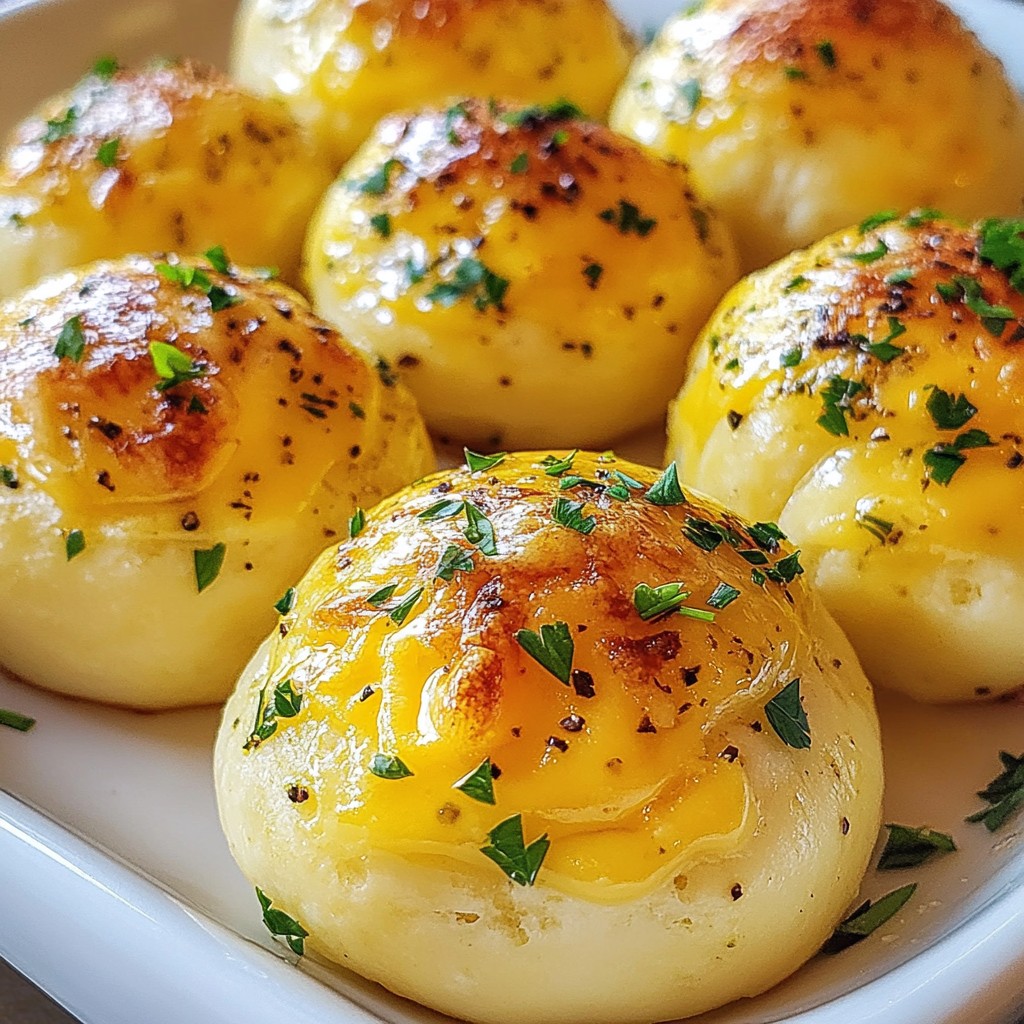
Looking for a quick and tasty appetizer? I’ve got just the thing: Garlic Butter Cheese Bombs! These bite-sized treats are fluffy, cheesy, and packed with flavor. Perfect for parties or a cozy night in, they’ll impress your guests and satisfy your cravings. Stay with me as I guide you through simple steps to make your own delicious cheese bombs! Let’s get cooking!
Why I Love This Recipe
- Easy to Make: This recipe requires minimal ingredients and simple steps, making it perfect for beginners or a quick snack.
- Cheesy Goodness: The combination of mozzarella cheese and garlic creates a rich, savory flavor that everyone loves.
- Customizable: Add your favorite herbs or spices to the dough or filling for a unique twist every time you make it.
- Perfect for Sharing: These cheese bombs are great for parties or gatherings; serve them warm for a crowd-pleasing appetizer!
Ingredients
List of Ingredients
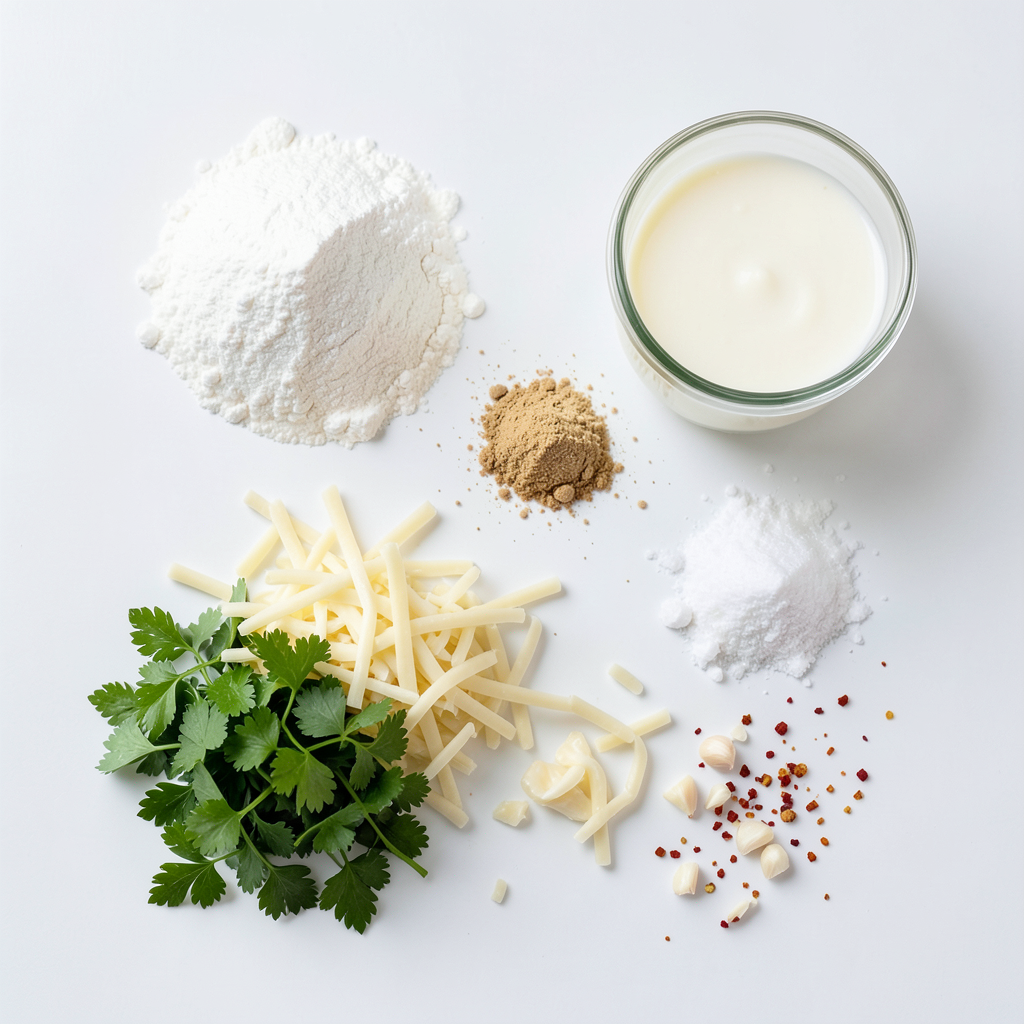
To make Garlic Butter Cheese Bombs, gather these simple items:
- 1 cup all-purpose flour
- 1 tablespoon baking powder
- ½ teaspoon salt
- ½ teaspoon garlic powder
- 1 cup shredded mozzarella cheese
- ½ cup milk
- ¼ cup unsalted butter, melted
- 2 cloves garlic, minced
Optional Ingredients
You can add these for extra flavor:
- 2 tablespoons fresh parsley, chopped
- ¼ teaspoon red pepper flakes
Tools Needed
To prepare your cheese bombs, you will need:
- Mixing bowls
- Whisk
- Baking sheet
- Parchment paper
- Rolling pin (optional)
- Knife for chopping garlic and parsley
These ingredients and tools will help you create a delicious and fun appetizer. You can impress your friends and family with these tasty cheese bombs!
Step-by-Step Instructions
Prepping the Oven and Baking Sheet
First, heat your oven to 375°F (190°C). This step is key to getting a nice, golden crust. Next, prepare your baking sheet. You can grease it or line it with parchment paper. This will help prevent sticking and make cleanup easy.
Mixing Dry Ingredients
In a mixing bowl, whisk together the dry ingredients. Combine 1 cup of all-purpose flour, 1 tablespoon of baking powder, ½ teaspoon of salt, and ½ teaspoon of garlic powder. Mixing these well ensures the flavors are even throughout the dough.
Combining Wet Ingredients
In another bowl, mix your wet ingredients. Combine ½ cup of milk and ¼ cup of melted unsalted butter. Stir this mixture slowly into the dry ingredients. Gently mix until a dough begins to form. Be careful not to over-mix; you want it just combined.
Forming the Garlic Butter Cheese Bombs
Now comes the fun part! On a lightly floured surface, knead the dough for about one minute. It should feel smooth. Divide the dough into 12 equal pieces. Take each piece and flatten it slightly. Place a small dollop of the minced garlic in the center. If you like a kick, add red pepper flakes here. Pinch the edges to seal the cheese and garlic inside, forming a nice ball.
Baking Instructions
Place each ball seam-side down on the baking sheet. Leave some space between them, as they will expand while baking. Bake in your preheated oven for 15-20 minutes. They should turn golden brown. While they bake, melt any remaining butter and mix in the chopped parsley for a drizzle later. Once done, let them cool for a few minutes. Brush the garlic butter mixture over the warm bombs before you serve them. Enjoy!
Tips & Tricks
Perfecting the Dough Texture
To get the best texture, you want a soft dough. Mix your dry ingredients well. This includes flour, baking powder, salt, and garlic powder. Make sure to coat the cheese in flour. This keeps it from clumping. When you add the wet mix, do not overwork it. Knead just until smooth. This creates light, fluffy cheese bombs.
Enhancing Flavor with Garlic and Parsley
Garlic is key to flavor in these cheese bombs. Use fresh garlic for a strong taste. Mince it finely so it blends well. If you like heat, add red pepper flakes. They add a nice kick. Fresh parsley gives a bright taste and looks good too. Mix it into the melted butter for a nice finish. Brush this mixture over the warm cheese bombs before serving.
Serving Suggestions for Appetizers
Serve these cheese bombs warm for the best taste. Arrange them on a nice platter. Sprinkle extra parsley on top for color. Offer toothpicks for easy eating. They pair well with marinara sauce or ranch dressing. Guests will love these tasty bites at any gathering!
Pro Tips
- Use Fresh Garlic: Freshly minced garlic will provide a more intense flavor compared to pre-minced or powdered garlic.
- Don’t Overmix: Mix the dough just until combined to keep the cheese bombs light and fluffy; overmixing can lead to a dense texture.
- Experiment with Cheese: Feel free to mix different types of cheese for added flavor; cheddar or pepper jack can give a nice twist.
- Serve Hot: These cheese bombs are best served immediately while they're warm and gooey for the ultimate cheesy experience.
Variations
Alternative Cheese Options
You can change the cheese in this recipe. Try using cheddar or gouda. These cheeses add a unique taste. If you want a sharp flavor, use aged cheddar. For a creamier option, go for brie. Mix different cheeses for a fun twist on the original.
Adding Spices and Herbs
Spices can take your cheese bombs to the next level. Consider adding dried oregano or Italian seasoning. A sprinkle of paprika can give a nice kick. Fresh herbs like basil or thyme work well too. Just chop them finely and mix them in the dough. This adds freshness and flavor to each bite.
Stuffed Cheese Bomb Ideas
Stuffed cheese bombs are a fun way to surprise your guests. You can add cooked bacon bits for a smoky taste. For a veggie option, try chopped spinach or sun-dried tomatoes. If you love heat, jalapeños or pepper jack cheese can spice things up. Each stuffing choice makes a new taste adventure!
Storage Info
Storing Leftover Cheese Bombs
To keep your leftover cheese bombs fresh, place them in an airtight container. You can store them in the fridge for up to three days. Make sure they are cool before sealing them to avoid moisture buildup. If you want to keep them longer, freezing is a great option.
Reheating Instructions
To reheat your cheese bombs, preheat your oven to 350°F (175°C). Place the cheese bombs on a baking sheet. Heat them for about 10 minutes or until they are warm and crispy again. You can also use a microwave, but they may lose some crispness. For best results, stick to the oven.
Freezing Cheese Bombs for Later
You can freeze cheese bombs before or after baking. If freezing before baking, prepare them as usual, then freeze them on a baking sheet. Once frozen, transfer them to a freezer bag. This way, you can bake them straight from the freezer. Bake for about 20-25 minutes, adding a few extra minutes if needed. If you freeze them after baking, let them cool first. Then, wrap them tightly and store in the freezer for up to a month.
FAQs
Can I make Garlic Butter Cheese Bombs ahead of time?
Yes, you can prepare the dough ahead of time. Just store it in the fridge for up to 24 hours. When ready to bake, let the dough warm up for a few minutes. Then, form and bake the cheese bombs as usual.
What can I serve with Garlic Butter Cheese Bombs?
These cheese bombs pair well with a variety of dips. Try serving them with marinara sauce, ranch dressing, or garlic aioli. They also go great with a fresh salad or a warm soup.
Can I use gluten-free flour for this recipe?
Absolutely! You can use gluten-free all-purpose flour. Make sure it has a good binding agent, like xanthan gum, for the best texture. The cheese bombs will still be delicious and fluffy.
How do I know when the cheese bombs are done baking?
Look for a golden brown color on the outside. They should puff up nicely and feel firm to the touch. A toothpick inserted should come out clean, showing the cheese is melted inside.
Are Garlic Butter Cheese Bombs vegetarian-friendly?
Yes, these cheese bombs are vegetarian-friendly. The ingredients do not include meat. Just make sure to use vegetarian cheese if you want to keep them strictly vegetarian.
In this article, we explored making delicious Garlic Butter Cheese Bombs. We covered ingredients and tools needed, along with step-by-step instructions. You learned tips for perfect dough and flavor boosts. We also discussed variations and storage options to keep them fresh.
These cheese bombs are fun and easy to make. Experiment with different flavors and enjoy them as snacks or appetizers. Now, it’s your turn to create these tasty bites!