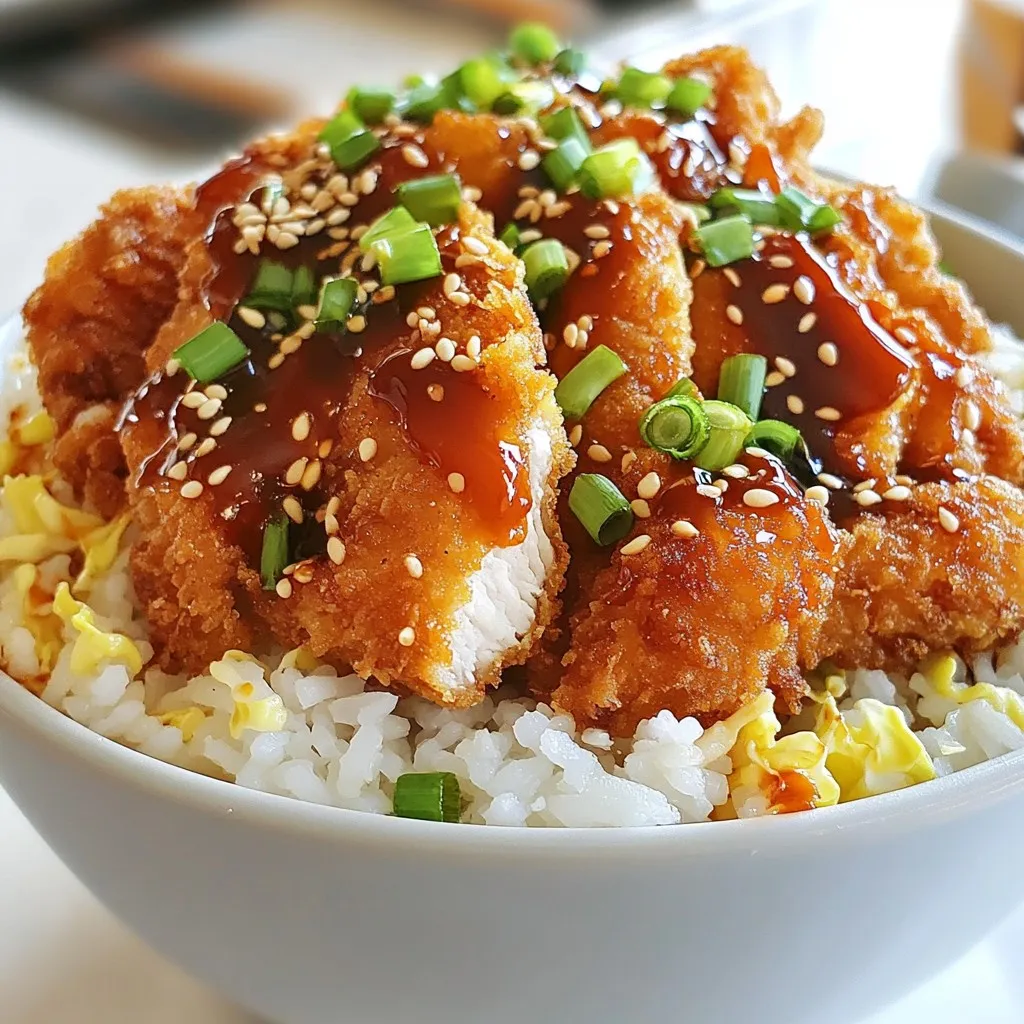
Looking for a quick and tasty meal? You’ll love these crispy Japanese katsu bowls! In this guide, I’ll share simple steps to make chicken katsu that’s crunchy and golden. You’ll learn what to use, how to cook, and tips for that perfect crunch. Whether you’re a busy parent or a new cook, this meal is easy for everyone. Let’s get started on deliciousness!
Why I Love This Recipe
- Crispy Perfection: The panko breadcrumbs give the chicken an irresistible crunch that contrasts beautifully with the tender meat.
- Flavorful Layers: Each bowl is a delightful mix of textures and flavors, from the savory chicken to the fresh cabbage and sweet tonkatsu sauce.
- Quick and Easy: This recipe comes together in just 30 minutes, making it perfect for a busy weeknight dinner.
- Customizable: Feel free to add your favorite veggies or adjust the sauce to suit your taste, making each bowl unique!
Ingredients
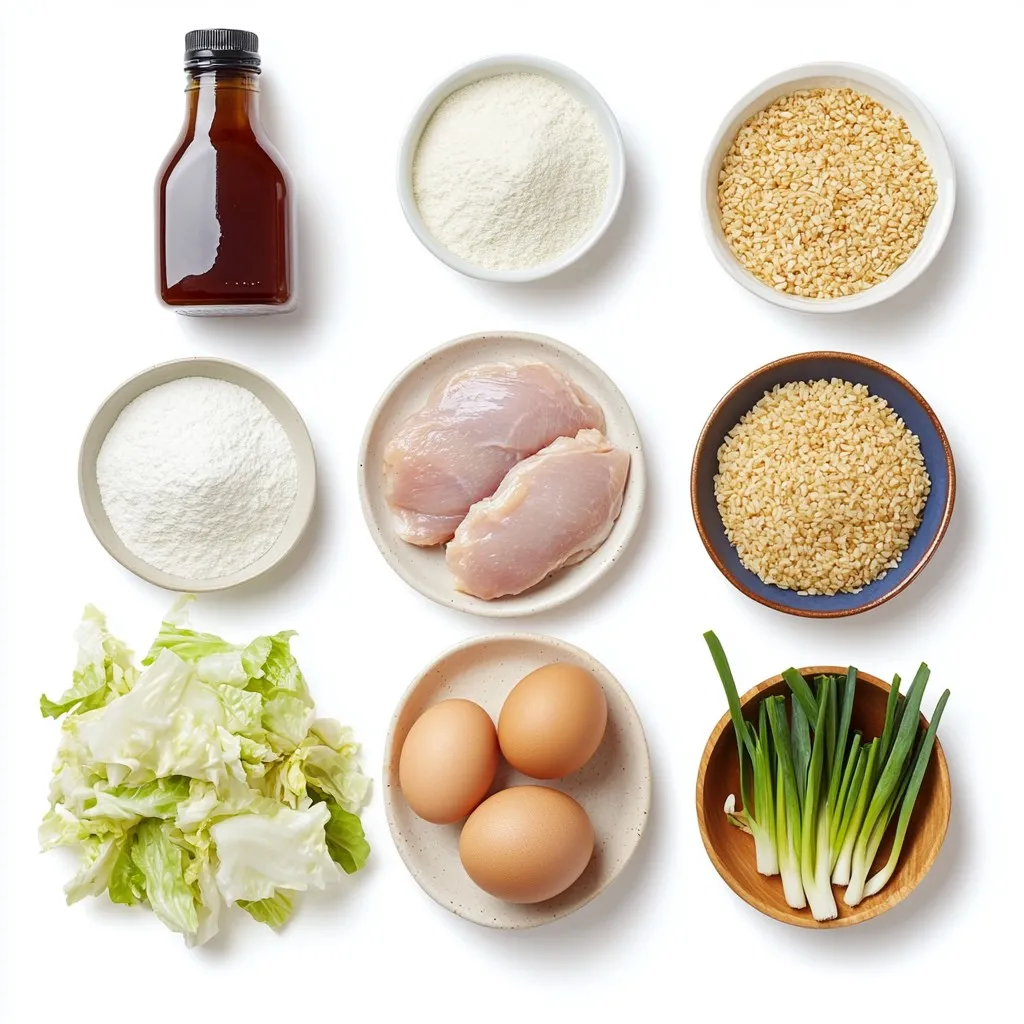
Main Ingredients for Crispy Japanese Katsu Bowls
– 2 chicken breasts, pounded to even thickness
– Salt and pepper, to taste
– 1 cup all-purpose flour
– 2 large eggs, beaten
– 1 ½ cups panko breadcrumbs
– Vegetable oil, for frying
– 2 cups cooked jasmine rice
The chicken is the star of this dish. Pounding it to an even thickness helps it cook evenly. This makes for juicy and tender meat. You can use chicken thighs too if you prefer.
Seasoning and Coating Components
– Salt and pepper, to taste
– 1 cup all-purpose flour
– 2 large eggs, beaten
– 1 ½ cups panko breadcrumbs
The flour helps the breadcrumbs stick. It creates a nice crunchy crust. The eggs act as glue, ensuring the panko stays on the chicken. Panko gives that extra crispiness you want in a katsu.
Garnishing Elements
– 1 cup shredded cabbage
– ½ cup sliced green onions
– ½ cup tonkatsu sauce
– Sesame seeds, for garnish
The shredded cabbage adds crunch and freshness. Green onions bring a nice bite. Tonkatsu sauce adds a sweet and savory layer of flavor. Finish with sesame seeds for a touch of elegance. Each ingredient plays a part in making your katsu bowl tasty and fun!
Step-by-Step Instructions
Preparing the Chicken
First, take your chicken breasts and pound them to an even thickness. This helps them cook evenly. Next, season both sides with salt and pepper. This simple seasoning brings out the chicken’s flavor.
Setting Up the Breading Station
Now, you need to set up a breading station. Grab three shallow dishes. In the first dish, add one cup of all-purpose flour. In the second, beat two large eggs. In the third dish, place one and a half cups of panko breadcrumbs. Make sure each dish is ready for the chicken.
Frying the Chicken to Perfection
Heat about half an inch of vegetable oil in a large skillet over medium heat. Wait until the oil shimmers. Carefully place the breaded chicken breasts in the hot oil. Fry the chicken for about four to five minutes on each side. Look for a golden brown color. This shows that the chicken is cooked and crispy. Once done, transfer the chicken to a plate lined with paper towels to drain excess oil.
Assembling the Katsu Bowls
After resting for a few minutes, slice the chicken into strips. Now it’s time to assemble your bowls. Start with a base of two cups of cooked jasmine rice. Next, add a layer of shredded cabbage. Arrange the sliced chicken on top. Finally, drizzle the tonkatsu sauce over the chicken. For the finishing touch, sprinkle sesame seeds and sliced green onions on top. Enjoy your delicious katsu bowls!
Tips & Tricks
Ensuring Perfect Crispiness
To achieve a crispy texture, follow these steps:
– Use panko breadcrumbs for crunch.
– Make sure the oil is hot enough.
– Fry in batches to avoid overcrowding.
– Let the chicken rest on paper towels after frying.
This helps keep the katsu crispy. You want that golden crunch with each bite.
Avoiding Common Mistakes
Avoid these common mistakes:
– Skipping the seasoning on the chicken.
– Not pressing the breadcrumbs onto the chicken.
– Frying at low temperatures.
These errors can lead to soggy katsu. Always check your oil temperature before frying.
Presentation Tips for Serving
Presentation matters! Here are some tips:
– Use a deep bowl for layers.
– Place jasmine rice as a base.
– Add shredded cabbage for color and crunch.
– Arrange sliced chicken on top.
– Drizzle with tonkatsu sauce, and sprinkle sesame seeds.
– Top with sliced green onions for freshness.
Serve hot for the best experience!
Pro Tips
- Choose the Right Oil: Use oils with a high smoke point like vegetable or canola oil for frying to achieve the perfect crispy texture.
- Rest Before Slicing: Let the fried chicken rest for a few minutes before slicing to keep it juicy and flavorful.
- Make Your Own Tonkatsu Sauce: For a fresh twist, mix ketchup, Worcestershire sauce, and a dash of soy sauce to create your own tonkatsu sauce at home.
- Serve Immediately: Katsu is best enjoyed right after frying while it’s still hot and crispy; consider prepping the rice and toppings in advance.
Variations
Alternate Proteins (Pork, Tofu)
You can swap the chicken for pork or tofu. For pork, use thin pork loin. Season it just like the chicken. Bread and fry it the same way. If you choose tofu, press it to remove water. Slice it into thick slabs. Coat it in flour, egg, and panko. Fry until golden and crispy. Both options taste great in katsu bowls.
Gluten-Free Options
To make this dish gluten-free, use gluten-free flour and panko. Rice flour works well as a substitute. It gives a nice crunch. You can also use cornstarch instead of flour. Just follow the same breading steps. This way, you can enjoy katsu bowls without the gluten.
Flavor Variations for Sauces
Tonkatsu sauce is tasty, but you can try other sauces. For a spicy kick, mix sriracha with mayo. You can also make a soy sauce and honey blend for sweetness. If you like citrus, try a yuzu sauce. Each sauce adds a new twist to your katsu bowl. Experiment and find your favorite!
Storage Info
Storing Leftovers Properly
To store your crispy katsu bowls, follow these easy steps. First, let the chicken cool down completely. This helps prevent sogginess. Next, place the chicken in an airtight container. You can add the rice and cabbage too, but keep the sauce separate. This keeps everything fresh. Store the container in the fridge for up to three days.
Reheating Tips for Best Texture
When you’re ready to enjoy your leftovers, reheating is key. Preheat your oven to 375°F (190°C). Place the chicken on a baking sheet. Cover it lightly with foil to keep it moist. Heat for about 15 minutes. For crispy skin, remove the foil for the last five minutes. You can reheat the rice in the microwave. Just add a splash of water to keep it fluffy.
Freezing the Katsu for Later Use
If you want to save katsu for later, freezing works great. Let the cooked chicken cool completely, just like before. Wrap each piece tightly in plastic wrap. Then, place them in a freezer-safe bag. You can freeze the chicken for up to three months. When you’re ready to eat, thaw in the fridge overnight. Reheat as mentioned above for tasty results.
FAQs
What is the best type of chicken for katsu?
The best type of chicken for katsu is chicken breast. I like to use boneless, skinless chicken breasts. They cook quickly and stay juicy. Pounding the chicken to an even thickness helps it cook evenly.
Can I make katsu ahead of time?
Yes, you can make katsu ahead of time. You can prepare the chicken and bread it. Just store it in the fridge until you are ready to fry. Frying right before serving keeps it crispy and fresh.
What can I serve with crispy katsu bowls?
You can serve katsu bowls with many tasty sides. Some great options are:
– Steamed vegetables
– Miso soup
– Pickled ginger
– Edamame
These sides add freshness and color to your meal.
How do I make homemade tonkatsu sauce?
Making homemade tonkatsu sauce is easy. You will need:
– 1/2 cup ketchup
– 1/4 cup Worcestershire sauce
– 2 tablespoons soy sauce
– 1 tablespoon sugar
– 1 teaspoon mustard
Mix these ingredients in a bowl. Adjust the flavors to your liking. This sauce pairs perfectly with your katsu.
What is the difference between katsu and schnitzel?
Katsu and schnitzel are similar but have key differences. Katsu comes from Japan and uses panko breadcrumbs. Schnitzel is from Germany and usually uses regular breadcrumbs. The sauces and sides served also differ, reflecting each dish’s culture.
You’ve now learned how to make crispy Japanese katsu bowls. We covered ingredients, instructions, and tips for the best results. Try different proteins and sauces to keep it fresh. Remember to store your leftovers well and reheat them properly for great taste. Enjoying this dish at home can bring joy and flavor to your meals. So get cooking and impress your friends and family with your new skill