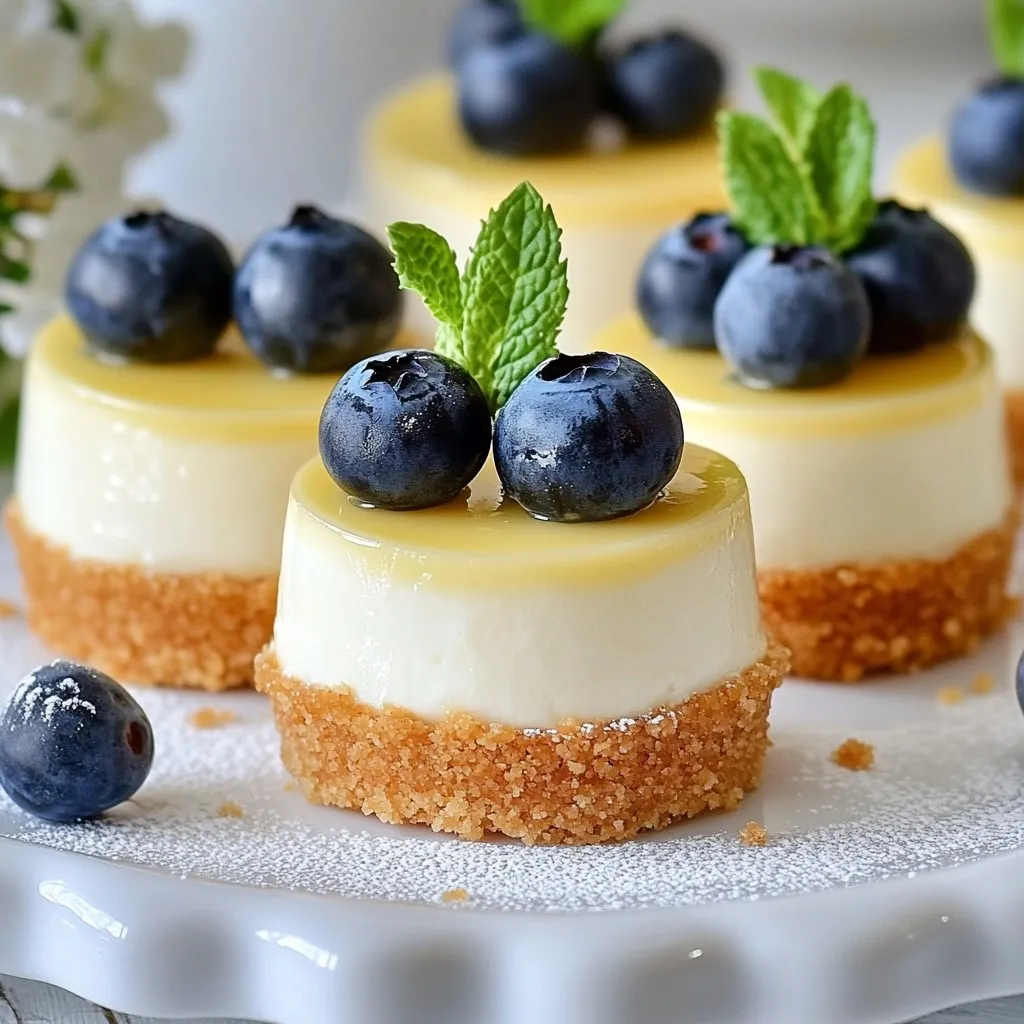
Are you ready to treat yourself to something delicious? These Classic Mini New York Cheesecakes are simple to make and full of rich flavor. With a buttery graham cracker crust and a creamy filling, they are sure to impress. Whether it’s a special occasion or just a sweet craving, this recipe is perfect for everyone. Let’s dive into the joy of baking these tiny delights together!
Why I Love This Recipe
- Deliciously Creamy: The combination of cream cheese and sour cream creates a rich and velvety texture that melts in your mouth.
- Perfect Portion Size: These mini cheesecakes are ideal for satisfying your sweet tooth without overindulging, making them a great dessert option.
- Customizable Toppings: Top with fresh blueberries, strawberries, or even a drizzle of chocolate for a personalized touch that elevates the flavor.
- Easy to Make: With simple ingredients and straightforward steps, these cheesecakes are perfect for bakers of all skill levels.
Ingredients
List of Required Ingredients
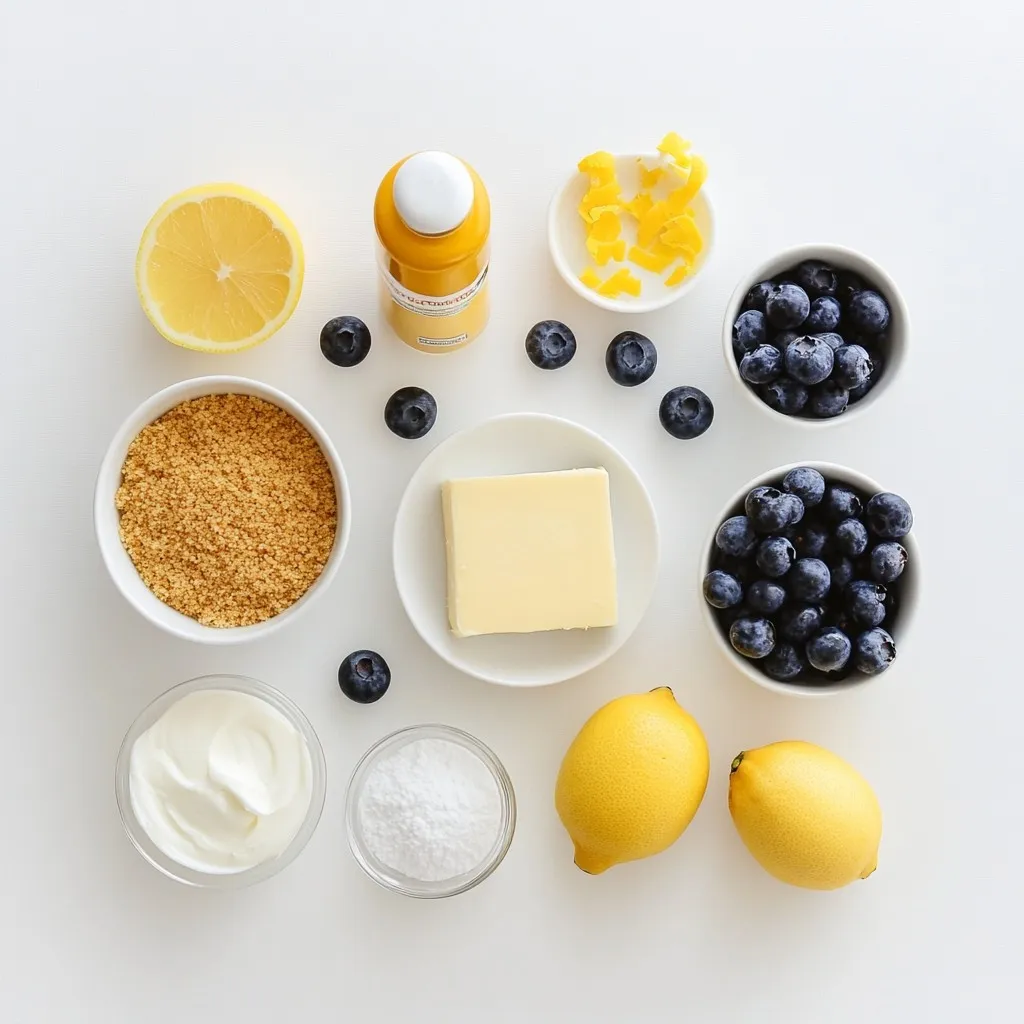
To make classic mini New York cheesecakes, you need a few simple ingredients. Here’s what you will need:
– Graham cracker crust components:
– 1 cup graham cracker crumbs
– 1/4 cup unsalted butter, melted
– 2 tablespoons sugar
– Cheesecake filling components:
– 16 oz cream cheese, softened
– 1/2 cup granulated sugar
– 1 teaspoon vanilla extract
– 2 large eggs
– 1/4 cup sour cream
– Zest of 1 lemon
– Toppings and garnishments:
– 1/4 cup fresh blueberries (for topping)
These ingredients work together to give you that rich, creamy texture and a delightful taste. The graham cracker crust brings a nice crunch, while the filling is smooth and tangy. Don’t forget the blueberries on top for a fresh finish!
Step-by-Step Instructions
Preparation of the Crust
First, you need to preheat your oven to 325°F (160°C). This step is vital for baking the crust just right. While the oven heats up, grab a bowl and mix the graham cracker crumbs, melted butter, and sugar. Stir until the mixture looks like wet sand.
Next, take about a tablespoon of this mix and press it firmly into the bottom of each muffin liner. This creates a solid base for your cheesecake. Bake the crust for just 5 minutes, then take it out and let it cool.
Making the Cheesecake Filling
Now, let’s make the filling. Take your softened cream cheese and place it in a large bowl. Use an electric mixer to beat it until it’s smooth and creamy. This step ensures you have a nice texture. Gradually add the granulated sugar while mixing, so the sugar blends well.
After that, it’s time to add flavor. Mix in the vanilla extract, then add the eggs one at a time. This keeps the mixture smooth. Finally, stir in the sour cream and lemon zest until everything is combined. Now your cheesecake filling is ready!
Baking the Mini Cheesecakes
Pour the cheesecake filling into each muffin liner, filling them about 3/4 full. This allows space for the cheesecakes to rise. Bake them for 18-20 minutes. The centers should be set but still a bit jiggly.
Once baked, remove them from the oven and let them cool in the pan for about 15 minutes. After that, move the mini cheesecakes to the fridge. Chill them for at least 2 hours to let them set completely.
Tips & Tricks
Perfecting the Texture
To achieve the right creaminess in your mini New York cheesecakes, it’s key to beat the cream cheese well. Start with softened cream cheese. This helps it mix smoothly. Use an electric mixer for best results. Blend until it feels fluffy and light.
To avoid cracks on the surface, bake at a low temperature. This keeps the cheesecakes from puffing up too much. When baking, check for doneness. The centers should be slightly jiggly. Let them cool slowly in the pan. This helps prevent them from cracking as they cool.
Serving Suggestions
For ideal garnishing, top each mini cheesecake with fresh blueberries. They add color and flavor. You can also dust them with powdered sugar for a sweet touch. A mint leaf makes a nice addition too.
Pair these cheesecakes with sauces or fruits. A drizzle of chocolate sauce can enhance the flavor. Consider serving them with a berry compote for a fruity contrast. Each option adds a delightful twist to the classic taste.
Pro Tips
- Chill for the Best Texture: Allow the mini cheesecakes to chill in the refrigerator for at least 2 hours. This helps them set properly and enhances the creamy texture.
- Softening Cream Cheese: Make sure to let your cream cheese soften at room temperature before mixing. This prevents lumps and ensures a smooth filling.
- Customize Your Toppings: Feel free to swap out blueberries for other fruits like strawberries or raspberries to create different flavor profiles for your mini cheesecakes.
- Check for Doneness: The cheesecakes are done when the edges are set and the centers still have a slight jiggle. Overbaking can lead to cracks and a dry texture.
Variations
Flavor Enhancements
You can make your mini cheesecakes unique by adding flavors. One easy way is using fruit purees. You can blend fresh fruits like strawberries or raspberries. Swirl this puree into your cheesecake batter for a fruity twist.
You can also add chocolates to create a rich taste. Melt some dark chocolate and mix it into the batter. This will give you a chocolate cheesecake that everyone will love.
Spices and extracts can also add special notes. Consider adding a pinch of cinnamon or nutmeg for warmth. A splash of almond extract can elevate the flavor too. These small changes can make a big impact.
Different Crust Options
While graham crackers work great, you can try other crumbs for the crust. Cookies like Oreos or gingersnaps can add a fun flavor. Just crush them up and mix with melted butter.
If you need a gluten-free option, there are alternatives. Use ground almonds or gluten-free cookies. Mix these with melted butter to form a crust. This way, everyone can enjoy your delicious treats.
Feel free to experiment with these ideas. Each variation can give you a new twist on the classic mini New York cheesecake!
Storage Info
Best Practices for Storing
To keep your mini New York cheesecakes fresh, follow these tips:
– Refrigeration: Place your cheesecakes in an airtight container. Store them in the fridge for up to 5 days.
– Long-term Storage: If you want to keep them longer, freeze them. Wrap each cheesecake in plastic wrap, then place them in a freezer-safe bag. They will last for about 2 months.
Reheating Recommendations
To enjoy your cheesecakes warm, follow these steps:
– Serving Warm: Preheat your oven to 250°F (120°C). Place the cheesecakes on a baking sheet and warm for about 10 minutes.
– Thawing: When ready to eat frozen cheesecakes, move them to the fridge overnight. You can also let them sit at room temperature for 2 hours. This helps them thaw evenly.
FAQs
What can I use instead of cream cheese?
You can use several alternatives if you do not have cream cheese. Some good options include:
– Mascarpone cheese
– Ricotta cheese
– Neufchâtel cheese
For vegan options, try using:
– Cashew cream
– Tofu blended until smooth
– Vegan cream cheese
These choices can help you make a tasty cheesecake.
Can I freeze mini New York cheesecakes?
Yes, you can freeze mini New York cheesecakes. Here’s how:
1. Cool the cheesecakes: Let them cool in the fridge for at least 2 hours.
2. Wrap them well: Use plastic wrap or foil to cover each cheesecake tightly.
3. Store in a container: Place them in a freezer-safe container.
For thawing, follow these steps:
1. Move to the fridge: Take the cheesecakes out and place them in the fridge overnight.
2. Serve cold: Enjoy them straight from the fridge for the best taste.
How long do mini cheesecakes last in the fridge?
Mini cheesecakes can last about 5 to 7 days in the fridge. To keep them fresh:
– Store them in an airtight container.
– Check for signs of spoilage, like a sour smell or changes in texture.
If you see any mold or off-colors, it’s best to throw them away. Enjoy your cheesecakes while they’re fresh!
This guide gives you all the steps to make mini New York cheesecakes. We covered the crust, filling, and baking conditions. I shared tips for the best texture and serving ideas. You can explore flavor variations and different crust styles too. Lastly, I shared storage and reheating tips. Now, you can enjoy these tasty treats anytime! With this knowledge, you’ll impress friends and family, while having fun in the kitchen. Enjoy your cheesecake journe