Are you ready to bake something festive? Christmas Cookie Bars are a sweet way to celebrate this season! In this guide, I’ll share simple steps and tips to make these delicious treats. Learn about key ingredients, easy methods, and fun variations to impress family and friends. Let’s make your holiday baking stress-free and tasty! Grab your apron, and let’s dive in!
Why I Love This Recipe
- Festive Flavor: These cookie bars are packed with the warm flavors of cinnamon and chocolate, making them a delightful treat during the holiday season.
- Easy to Make: With simple ingredients and quick steps, these bars come together effortlessly, perfect for busy holiday baking.
- Customizable: Add your favorite nuts or extra chocolate chips to personalize these cookie bars to your taste!
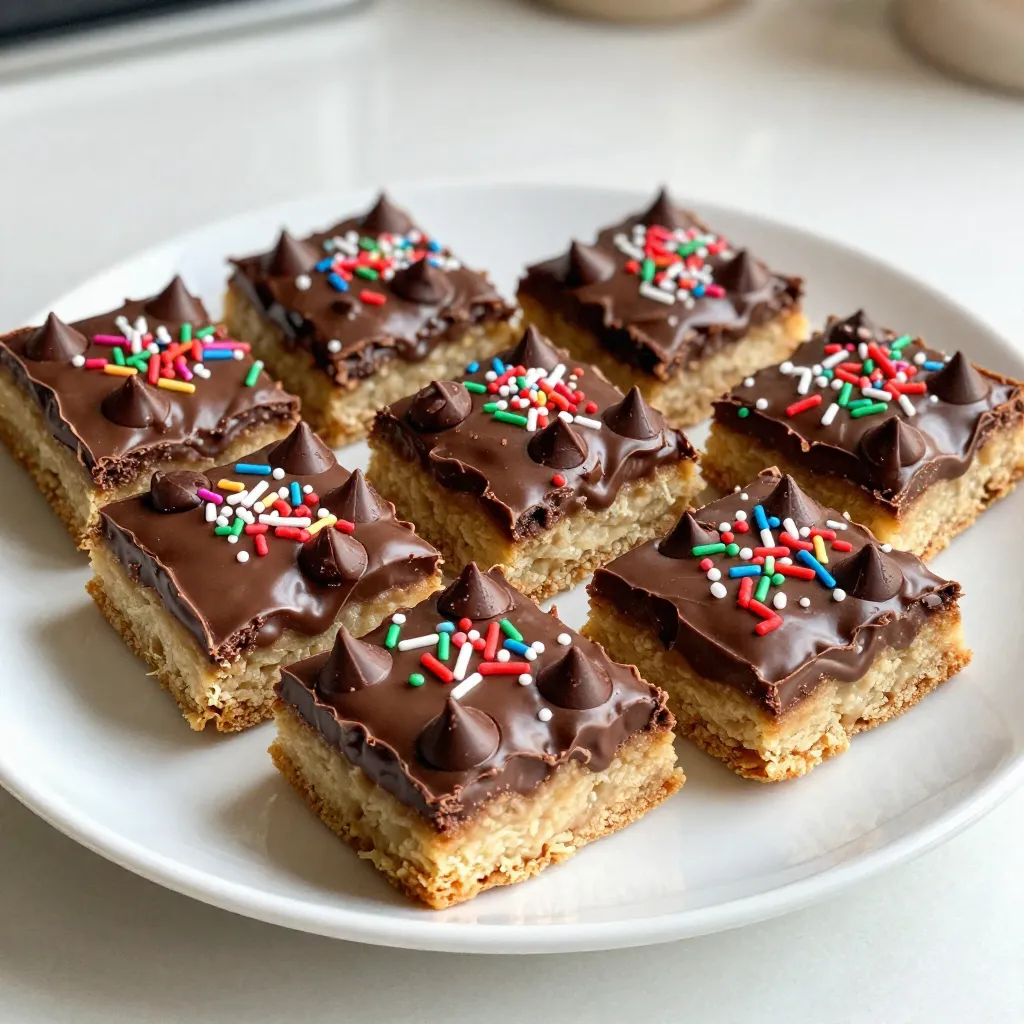
- Perfect for Sharing: Cut them into squares and serve on a festive platter, making these bars ideal for holiday gatherings and parties.
Ingredients
Complete list of ingredients
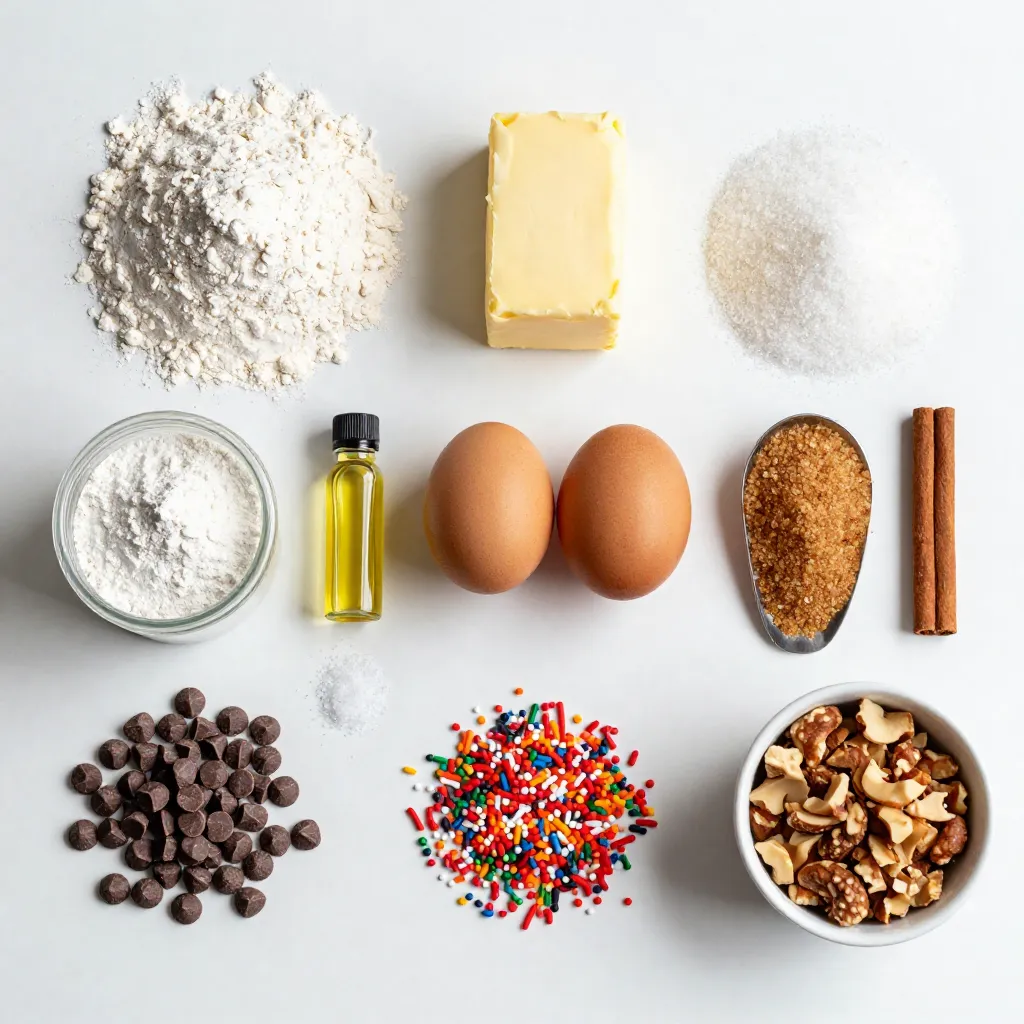
To make these tasty Christmas Cookie Bars, you need:
– 2 1/2 cups all-purpose flour
– 1 cup unsalted butter, softened
– 1 cup granulated sugar
– 1/2 cup brown sugar, packed
– 2 large eggs
– 1 teaspoon vanilla extract
– 1 teaspoon baking powder
– 1/2 teaspoon baking soda
– 1/2 teaspoon salt
– 1 teaspoon ground cinnamon
– 1 cup semi-sweet chocolate chips
– 1 cup holiday-themed sprinkles
– Optional: 1/2 cup chopped nuts (e.g., walnuts or pecans)
Ingredient substitutions
You can swap some ingredients if needed:
– Use coconut oil instead of butter for a dairy-free option.
– Replace white sugar with coconut sugar for a healthier choice.
– Try almond flour if you want gluten-free bars.
– Use maple syrup instead of granulated sugar for a unique flavor.
Importance of quality ingredients
Using quality ingredients makes a big difference. Fresh butter adds rich flavor. Good chocolate chips melt perfectly. High-quality spices enhance the taste. When you use fresh eggs, your bars rise better. Always aim for the best ingredients you can find. They help create a festive treat that you and your family will love.
Step-by-Step Instructions
Prepping the oven and baking pan
First, set your oven to 350°F (175°C). This heat is perfect for baking. Next, grab a 9×13 inch baking pan. Line it with parchment paper. Leave some paper hanging over the edges. This will help you lift the bars out later.
Mixing wet ingredients
In a large bowl, add the softened butter, granulated sugar, and brown sugar. Beat them together for about 2-3 minutes. You want the mix to be light and fluffy. Then, crack in the two eggs. Mix in each egg one at a time. After that, add the vanilla extract and stir well. This mixture should feel smooth and creamy.
Combining dry ingredients and baking process
In a separate bowl, whisk together the flour, baking powder, baking soda, salt, and ground cinnamon. This step helps blend all the dry goods. Slowly add the dry mix to your wet mix. Stir it just until combined, but don’t overmix. Gently fold in the chocolate chips, holiday sprinkles, and nuts if you want. Spread this batter evenly in your baking pan. Use a spatula to smooth the top.
Now, bake the bars for 25-30 minutes. To check if they’re done, insert a toothpick in the center. If it comes out clean, your bars are ready. The edges should look golden brown. Once baked, let them cool in the pan for about 10 minutes. Then, lift the bars out using the edges of the parchment paper. Finally, let them cool completely on a wire rack before cutting them into squares.
Tips & Tricks
Achieving the perfect texture
To get soft and chewy cookie bars, use room temperature butter. This helps it mix well with the sugars. Cream the butter and sugars until light and fluffy. This should take about 2-3 minutes. Be careful not to overmix the dough after adding flour. Mixing just until combined keeps the bars tender.
Decorating ideas for Christmas Cookie Bars
Make your cookie bars festive with fun decorations! After they cool, top them with a mix of sprinkles. You can also drizzle melted chocolate over the bars for a sweet touch. Use holiday-themed sprinkles for extra cheer. If you want a personal touch, add some chopped nuts or even crushed candy canes for a fun twist.
Common mistakes to avoid
One mistake is using cold butter. Cold butter won’t blend well, leading to dense bars. Another common error is overbaking. Keep an eye on the edges. They should be golden and the center should look slightly underbaked. Lastly, resist the urge to skip the parchment paper. It makes removing the bars easy and keeps them from sticking to the pan.
Pro Tips
- Chill Your Dough: For a firmer texture and enhanced flavor, chill the cookie dough for 30 minutes before spreading it in the pan.
- Even Baking: Rotate the baking pan halfway through the baking time to ensure even cooking and browning.
- Check for Doneness: Check the bars a few minutes before the end of the baking time; they should be golden around the edges but still soft in the center.
- Decorate with Style: Add extra holiday sprinkles or a drizzle of melted chocolate on top after cooling for a festive touch.
Variations
Peppermint Christmas Cookie Bars
You can add a festive twist to your cookie bars with peppermint. Start by mixing in 1 cup of crushed peppermint candies or candy canes into the batter. This gives the bars a nice crunch and a refreshing mint taste. You can also sprinkle some crushed candies on top as a decoration. This adds color and extra flavor.
Gingerbread Cookie Bars adaptation
For a cozy, spiced flavor, try gingerbread cookie bars. Use the same base recipe but add 2 teaspoons of ground ginger, 1 teaspoon of ground nutmeg, and 1/2 teaspoon of ground cloves. These spices will give your bars that classic gingerbread taste. You can also swap out the chocolate chips for raisins or chopped candied ginger for a fun twist.
Customizing flavor options
Feel free to get creative with flavors! You can switch up the chocolate chips with white chocolate or caramel bits. Add in some dried fruits like cranberries or apricots for a fruity touch. If you love nuts, consider using pecans or almonds. You can also experiment with different extracts like almond or orange to change the flavor profile. The options are endless!
Storage Info
Best practices for storing cookie bars
To keep your cookie bars fresh, store them in an airtight container. Use parchment paper to separate layers. This will stop them from sticking together. If you want to keep them extra fresh, place a slice of bread in the container. The bread will absorb moisture and keep your bars soft.
Freezing and thawing instructions
If you want to freeze your cookie bars, first cut them into squares. Wrap each square in plastic wrap. Then place them in a freezer-safe bag. They can last up to three months in the freezer. To thaw, take them out and leave them at room temperature for about an hour. You can also warm them in the microwave for a few seconds if you prefer a gooey treat.
Shelf life of Christmas Cookie Bars
If stored well, your cookie bars can last up to a week at room temperature. Keep them away from direct sunlight or heat. For the best taste and texture, eat them within the first few days. If you notice any changes in texture or smell, it’s best to toss them out. Enjoy your festive treats while they are fresh!
FAQs
Can I use gluten-free flour for this recipe?
Yes, you can use gluten-free flour. Look for a 1:1 gluten-free blend. These blends often work well in most recipes. You might want to add a bit of xanthan gum if it’s not already included. This helps with the texture. Your cookie bars will still taste great and be festive!
How can I make these cookie bars vegan?
To make these cookie bars vegan, substitute the eggs with flax eggs. Mix 1 tablespoon of flaxseed meal with 2.5 tablespoons of water for each egg. Let it sit for 5 minutes to thicken. Use vegan butter instead of regular butter. You can also choose dairy-free chocolate chips. Your cookie bars will be just as yummy!
What are the best ways to gift Christmas Cookie Bars?
Gifting cookie bars is easy and fun! First, cut the bars into neat squares. Place them in a festive tin or box. You can add a fun note or a recipe card for a personal touch. Wrap the box with a ribbon for extra cheer. These cookie bars make great gifts for friends, family, or coworkers!
In this blog post, I covered the key ingredients for Christmas cookie bars, their substitutes, and why quality matters. I shared step-by-step instructions, tips for perfect texture, and fun decorating ideas. I also offered variations, storage tips, and answers to common questions.
Baking Christmas cookie bars should be fun and creative. Remember to experiment and enjoy each step. You’ll impress family and friends with your tasty treat