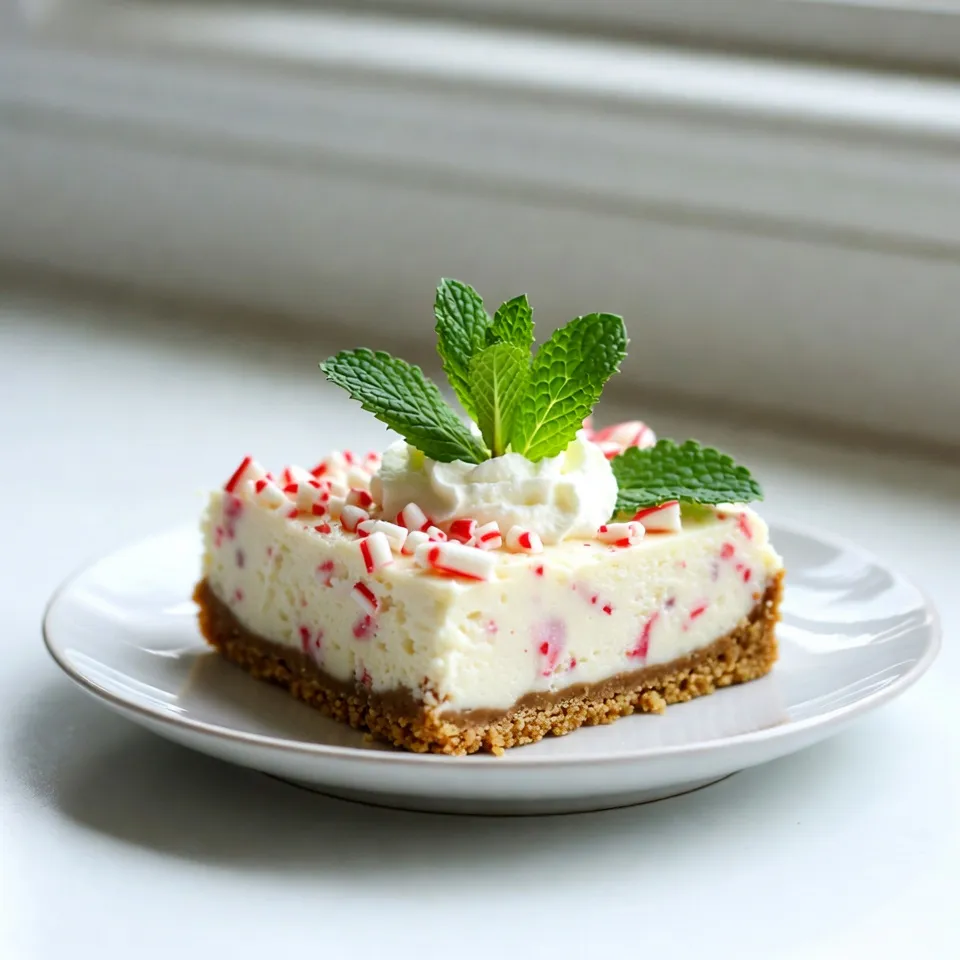
Get ready to wow your taste buds with my Christmas Cheesecake Bars! This festive treat combines rich cream cheese, a buttery crust, and delightful toppings to create a creamy dessert perfect for holiday gatherings. I’ll guide you through each step, ensuring you achieve the perfect texture and flavor. Whether you want to impress guests or treat yourself, these bars will steal the show. Let’s dive into this sweet holiday classic!
Why I Love This Recipe
- Festive Flavor: The combination of cream cheese, peppermint, and crushed candy canes creates a delightful holiday flavor that’s perfect for Christmas gatherings.
- Easy to Prepare: This recipe is straightforward with minimal steps, making it accessible for bakers of all skill levels.
- Make Ahead: These cheesecake bars can be made in advance and stored in the refrigerator, allowing you to enjoy stress-free entertaining.
- Beautiful Presentation: The vibrant red and white colors of the crushed candy canes and whipped cream make for a stunning holiday dessert.
Ingredients
Main Ingredients for Cheesecake Bars
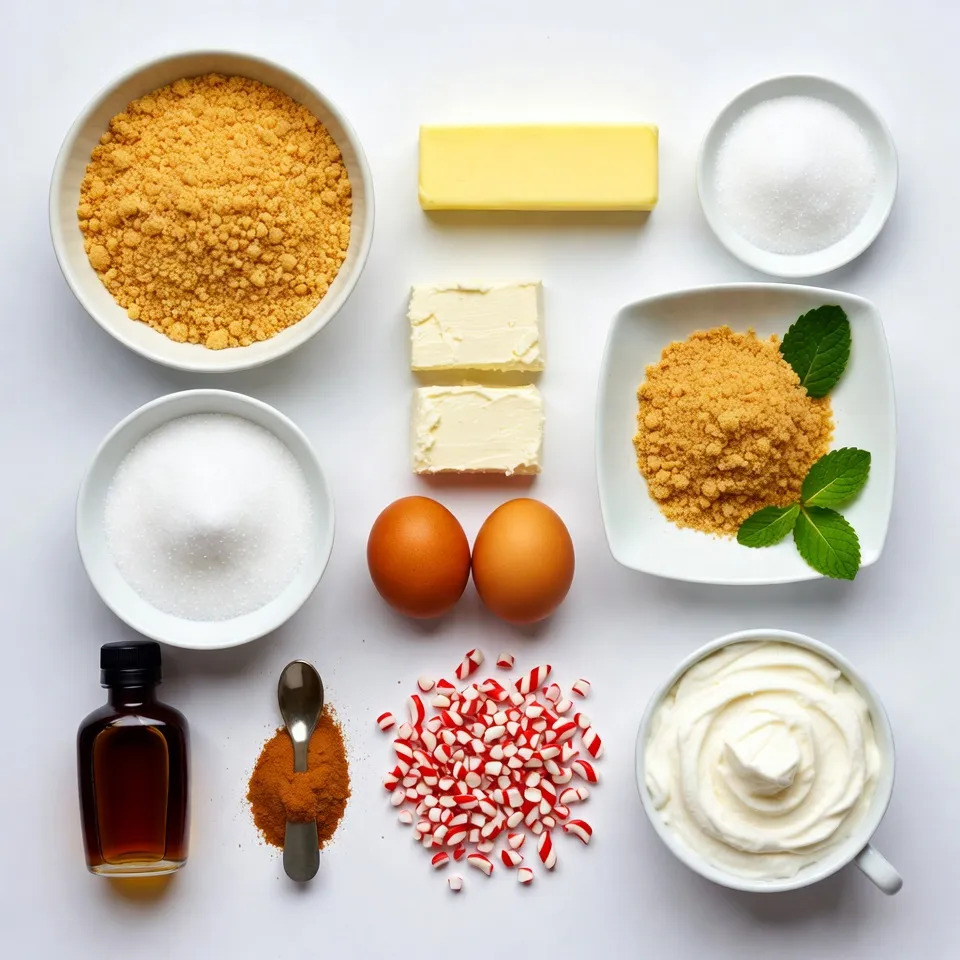
– 2 (8-ounce) packages cream cheese, softened
– 1 ½ cups graham cracker crumbs
– ½ cup unsalted butter, melted
– ½ cup granulated sugar
– ¼ cup brown sugar
– 3 large eggs
The cream cheese gives the bars a rich and smooth texture. I always use softened cream cheese for easy mixing. The graham cracker crumbs create a tasty crust. Melted butter binds the crumbs, making a sturdy base. I add both granulated sugar and brown sugar for a sweet depth in flavor. The eggs help set the filling, giving it that perfect creamy consistency.
Toppings and Garnishes
– 1 cup whipped cream (for topping)
– 1 cup crushed candy canes
– Fresh mint leaves (for garnish)
Whipped cream adds a light, airy touch on top. I love using crushed candy canes for that festive crunch and minty flavor. Fresh mint leaves not only look pretty, but they also bring a burst of freshness to each bite.
Optional Ingredients for Flavor
– 1 teaspoon vanilla extract
– 1 teaspoon peppermint extract
– 1 teaspoon ground cinnamon
Vanilla extract enhances sweetness and warmth. Peppermint extract boosts the holiday spirit, giving a delightful zing. Ground cinnamon adds warmth and a hint of spice, perfect for the season. You can mix and match these for a flavor that fits your taste best.
Step-by-Step Instructions
Preparation of the Crust
First, preheat your oven to 325°F (160°C). This step is important for even baking. Next, grab an 8×8 inch baking pan. Line it with parchment paper. Leave some paper hanging over the edges. This makes it easy to lift the bars out later.
In a mixing bowl, combine 1 ½ cups of graham cracker crumbs, ½ cup of melted unsalted butter, and 2 tablespoons of sugar. Stir until the mixture looks like wet sand. Now, press this crumb mixture evenly into the bottom of the pan. This forms the crust. Bake this in the oven for 8-10 minutes. You want it to be lightly golden. Once done, remove it and let it cool slightly.
Making the Cheesecake Filling
Now for the filling! In a large bowl, beat together 2 packages of softened cream cheese. Use an electric mixer until it’s smooth and creamy. Gradually add in ½ cup of granulated sugar and ¼ cup of brown sugar. Keep mixing until it all combines well.
Next, add in 3 large eggs one at a time. Mix just until you see no more streaks. Then, add 1 teaspoon of vanilla extract, 1 teaspoon of peppermint extract, and 1 teaspoon of ground cinnamon. Mix until everything is well combined. Finally, gently fold in 1 cup of crushed candy canes. This gives the bars a festive twist!
Baking and Cooling Process
Pour the cheesecake filling over the pre-baked graham cracker crust. Use a spatula to smooth the top. Bake this in the oven for 30-35 minutes. The edges should be set while the center is slightly jiggly.
Once it’s done, turn off the oven. Crack the oven door open a bit. This helps the bars cool down gradually. Let them sit for about an hour. Then, refrigerate the cheesecake bars for at least 4 hours, or overnight if you can wait. This cooling time is key for a great texture.
After they are fully chilled, lift the cheesecake out using the parchment paper. Cut into squares. Top each piece with a dollop of whipped cream and a sprinkle of crushed candy canes. A fresh mint leaf also adds a nice touch!
Tips & Tricks
How to Achieve the Perfect Texture
To get the best texture for your cheesecake bars, start with the cream cheese. Make sure it is softened. This helps it blend smoothly. Use an electric mixer and beat it until creamy. Add the sugars slowly. This method makes the mixture light and fluffy.
Cooling is also key. After baking, turn off the oven and crack the door. Let the bars cool in the oven for about an hour. This gradual cooling helps prevent cracks. If you skip this step, the bars may crack when they cool too fast.
Decorating Suggestions
Decorating your cheesecake bars can be fun and easy. Start with a dollop of whipped cream on top. This adds a creamy touch. Then, sprinkle crushed candy canes over the whipped cream. It adds color and a festive crunch.
For an extra pop, use fresh mint leaves. Place one or two on each bar. It adds a splash of green and looks great. Arrange the bars on a decorative platter. You can use festive paper liners for a cheerful touch. Dust with powdered sugar for a snowy effect.
Common Mistakes to Avoid
One big mistake is overbaking your cheesecake bars. Keep an eye on them in the oven. The edges should be set, but the center should still jiggle slightly. This means they are ready to cool.
Another mistake is not allowing enough cooling time. If you cut the bars too soon, they may fall apart. Wait until the bars are fully chilled. This can take at least four hours in the fridge. Patience pays off with a perfect slice!
Pro Tips
- Chill the Cream Cheese: Ensure your cream cheese is softened to room temperature for a smooth filling. This prevents lumps and creates a creamy texture.
- Don’t Overmix: When adding the eggs, mix just until incorporated. Overmixing can introduce air, causing cracks in your cheesecake.
- Test for Doneness: The center of the cheesecake should be slightly jiggly when you take it out of the oven. It will continue to set as it cools.
- Decorate with Style: For a festive presentation, use a piping bag to add whipped cream and sprinkle crushed candy canes on top just before serving.
Variations
Flavor Variations
You can make your Christmas cheesecake bars even more fun. Try adding different extracts. Almond or hazelnut can bring a new taste. Just swap in one teaspoon for half the vanilla extract.
Toppings can also change the game. Use crushed candies like toffee or chocolate instead of candy canes. They add a unique twist to the bars. You can mix and match based on your favorite flavors.
Dietary Substitutions
If you need a gluten-free option, use gluten-free graham crackers. You can find these in most stores. They work just as well and taste amazing.
For a vegan version, substitute cream cheese with a vegan cream cheese. Brands like Tofutti or Daiya are great choices. They keep the creamy texture without dairy.
Mini Cheesecake Cups
Mini cheesecake cups are a cute way to serve these bars. To make them, line a muffin tin with paper liners. Use the same crust but press it into each liner.
Pour the filling into each cup. Bake them for about 20-25 minutes. Check if they are set but still a bit jiggly. Let them cool, and then chill in the fridge. They make perfect bite-sized treats for any gathering!
Storage Info
Best Ways to Store Cheesecake Bars
To keep your Christmas cheesecake bars fresh, follow these simple steps. First, place them in the fridge. Use an airtight container to prevent drying out. You can also wrap the bars tightly in plastic wrap. This helps keep them moist and tasty.
Freezing Instructions
If you want to save some for later, freezing is a great option. First, cut the cheesecake bars into squares. Then, place them in a single layer on a baking sheet. Freeze them for about an hour. Once firm, transfer the bars to an airtight container or freezer bag. Make sure to remove any air to prevent freezer burn.
When you are ready to eat, take the bars out of the freezer. Place them in the fridge for a few hours to thaw. For the best taste and texture, enjoy them once they are fully thawed.
Shelf Life of Cheesecake Bars
In the fridge, these cheesecake bars last about five days. To keep them fresh, check for any signs of spoilage, like an off smell. Always store them in an airtight container to help prolong their life. If you freeze them, they can last up to three months. Enjoy your dessert at its best by following these storage tips!
FAQs
Can I make these cheesecake bars ahead of time?
Yes, you can make these cheesecake bars ahead of time. I recommend chilling them for at least four hours before serving. For the best flavor, let them sit in the fridge overnight. This allows all the flavors to blend nicely. When you are ready to serve, you’ll have a tasty dessert waiting for you.
What can I use as a substitute for graham cracker crust?
If you need a substitute for graham cracker crust, you have options. You can use digestive biscuits. They give a nice flavor too. Another option is using crushed vanilla wafers. For a gluten-free version, try almond flour mixed with melted butter and a bit of sugar. Each alternative will provide a unique twist to your bars.
How can I tell when the cheesecake is done baking?
To know when your cheesecake bars are done, look for a few signs. The edges should be set while the center remains slightly jiggly. This means it will firm up as it cools. You can also insert a toothpick in the center; it should come out clean or with a few crumbs. If it comes out wet, it needs more time in the oven.
You learned all about making cheesecake bars from scratch. We covered the main ingredients: cream cheese, graham cracker crumbs, and sugars. You also saw how to prepare and bake them step by step. Remember to avoid overbaking and let them cool slowly for the best texture. Feel free to get creative with flavors and toppings. With the right storage, you can enjoy your cheesecake bars for days. Now, it’s time for you to make your own delicious treat