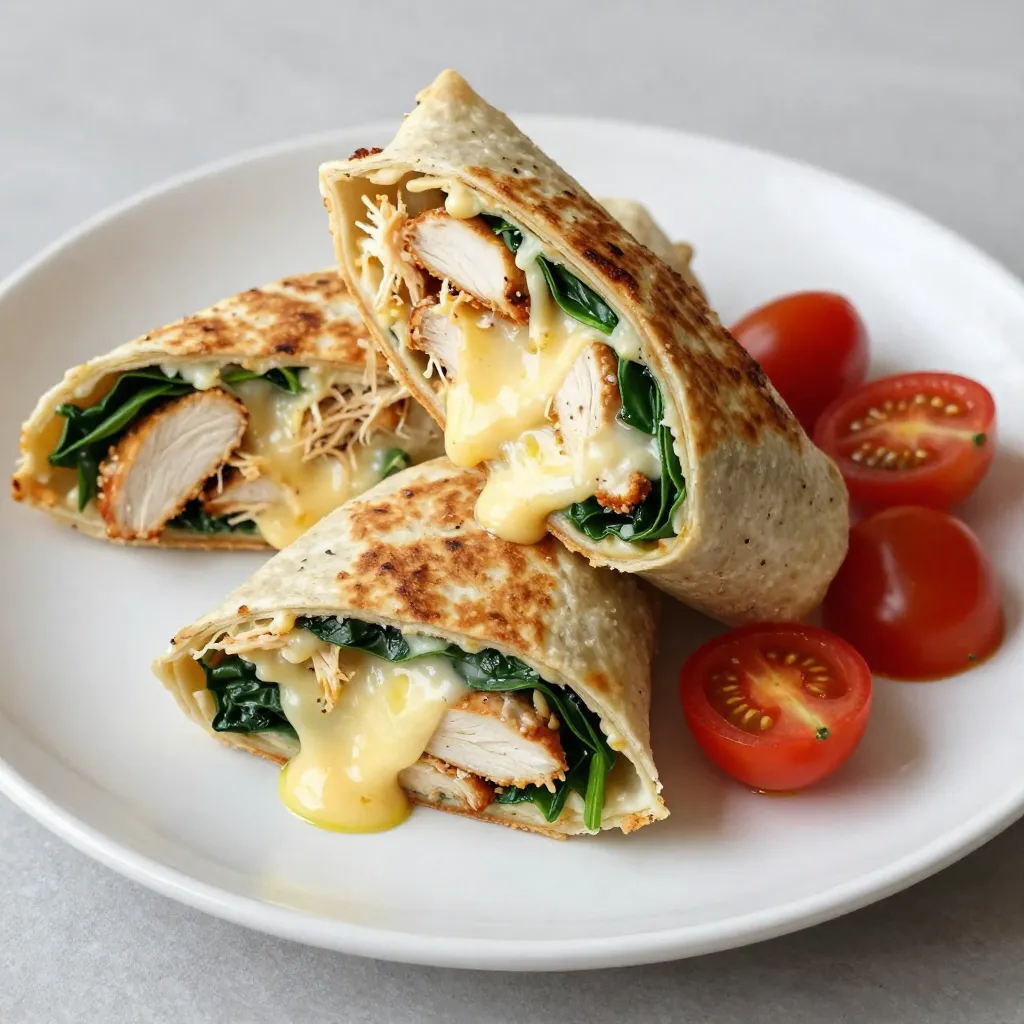
Craving a quick meal that packs a punch? You’ll love these Cheesy Garlic Chicken Wraps! They’re simple to make, loaded with flavor, and perfect for any occasion. In this post, I’ll guide you step-by-step through the recipe. You’ll find tips to customize your wraps and ideas for serving. Get ready to impress your family and friends with a meal that’s tasty and full of cheesy goodness!
Why I Love This Recipe
- Delicious Flavor Combination: The blend of creamy cheeses, garlic, and spices creates a mouthwatering filling that is hard to resist.
- Quick and Easy Prep: With just 15 minutes of prep time, this recipe is perfect for busy weeknights or last-minute gatherings.
- Customizable Ingredients: You can easily swap out ingredients based on your preferences, like using different veggies or meats.
- Perfect for Meal Prep: These wraps can be made ahead of time and stored in the fridge, making them great for lunches or snacks.
Ingredients
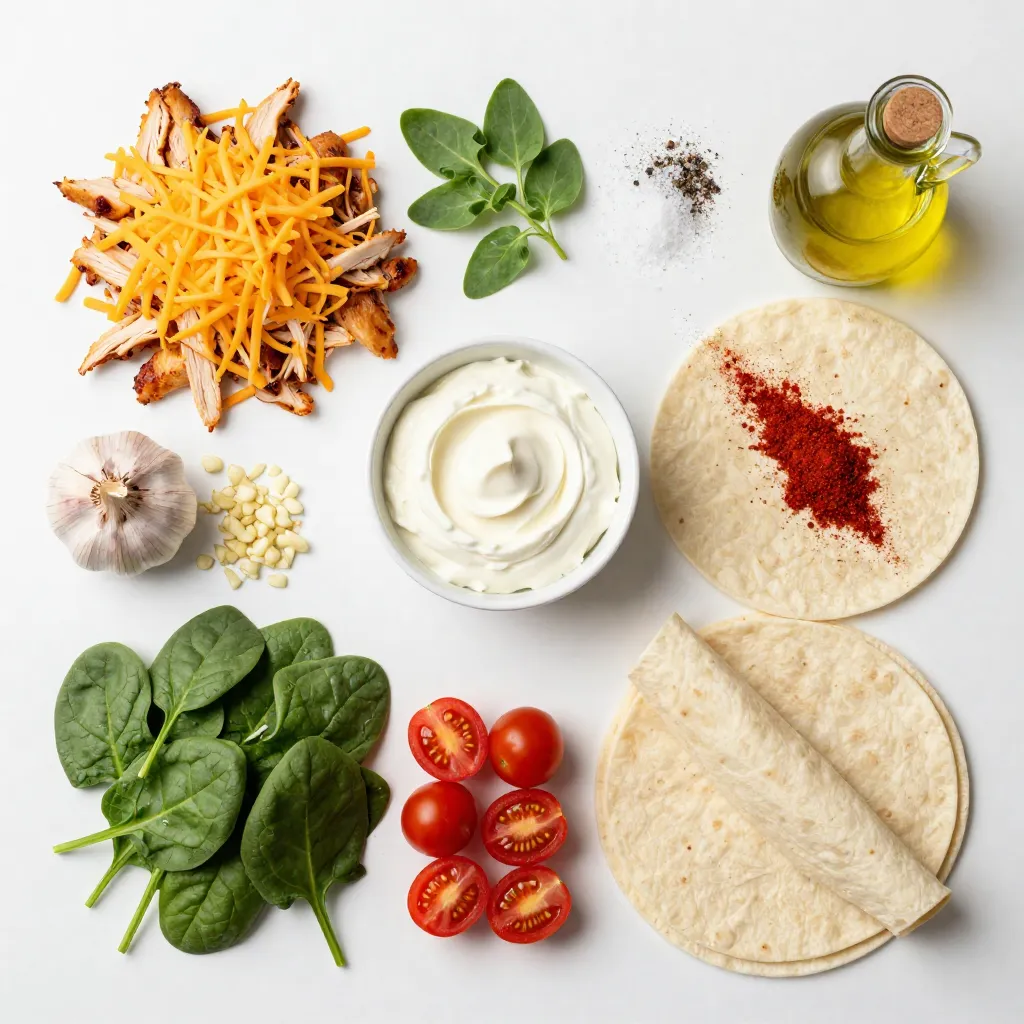
List of Ingredients
– 2 cups cooked chicken, shredded
– 1 cup shredded mozzarella cheese
– 1/2 cup cream cheese, at room temperature
– 3 cloves garlic, minced
– 1 teaspoon dried oregano
– 1 teaspoon paprika
– 4 large flour tortillas
– 1 cup baby spinach, chopped
– 1/2 cup cherry tomatoes, halved
– Salt and pepper to taste
– Olive oil for brushing
To make Cheesy Garlic Chicken Wraps, you need some key ingredients. First, gather your cooked chicken. Shredded chicken gives the wrap a nice texture. Next, grab your mozzarella cheese. This cheese melts well and adds a creamy taste. Cream cheese also plays an important role. It helps bind all the flavors together.
You will also need garlic. Fresh garlic adds a strong flavor that pairs well with chicken. Dried oregano and paprika bring warmth and depth. Don’t forget the tortillas! Large flour tortillas hold the filling well.
For freshness, you have baby spinach and cherry tomatoes. Spinach adds a crunchy bite, while tomatoes offer sweetness. Season with salt and pepper to enhance the taste. Finally, olive oil is important for a golden, crispy outside.
With these ingredients, you are ready to create a delicious meal that is both easy and enjoyable!
Step-by-Step Instructions
Preparation of Filling
To start, mix the cooked chicken with the cheeses in a bowl. You need 2 cups of shredded chicken, 1 cup of mozzarella, and 1/2 cup of cream cheese. Next, add the minced garlic, dried oregano, paprika, salt, and pepper. Stir until everything is well blended. This mix should be creamy but not too runny. Aim for a nice, spreadable texture.
Assembly of Wraps
Lay a tortilla flat on your clean surface. Spoon 1/4 of the chicken mixture into the center. Top it with a handful of chopped spinach and some halved cherry tomatoes. Now, fold the sides of the tortilla inward. Roll it tightly from the bottom to the top. This helps keep the filling inside. Repeat for the other tortillas.
Cooking Instructions
Heat a skillet over medium heat. Brush the outside of each wrap with olive oil. Place the wraps seam-side down in the skillet. Cook them for about 3-4 minutes until they turn golden brown. Flip them gently and cook for another 3-4 minutes. Once done, take them out and let them cool for a minute. Slice each wrap in half diagonally. Enjoy your cheesy garlic chicken wraps!
Tips & Tricks
Perfecting the Wraps
To make the best cheesy garlic chicken wraps, you want them crispy. Start by heating your skillet well. A hot pan helps get that golden brown crust. Brush the outside with olive oil for extra crunch. If the skillet is too cool, the wraps may get soggy.
To avoid sogginess, don’t overfill your wraps. Keep the filling balanced. Use just enough chicken and veggies to fill the wrap without spilling out. Also, make sure your cream cheese is at room temperature. This helps it blend smoothly, keeping the mix thick and creamy.
Serving Suggestions
These wraps shine with the right dips. I love a rich marinara sauce. It adds a nice tang. Garlic dipping sauce is also great. It enhances the garlic flavor you already have.
For presentation, slice each wrap in half. Arrange them on a platter. Sprinkle fresh basil or parsley on top. This makes the dish pop with color and freshness.
Customization Options
Feel free to mix up the ingredients! Want a kick? Add jalapeños or spicy cheese. You can also switch the chicken for turkey or even tofu for a veggie option.
Other add-ins can elevate your wraps. Try adding bell peppers or onions for crunch. You can even toss in some black beans for extra protein. The more creative you get, the more fun your wraps will be!
Pro Tips
- Use Leftover Chicken: This recipe is perfect for using up leftover rotisserie or grilled chicken, making it a quick and easy meal option.
- Customize Your Fillings: Feel free to add other vegetables like bell peppers or mushrooms for extra flavor and nutrition.
- Don’t Overfill: Be mindful not to overstuff the wraps, as this can make them difficult to roll and could lead to spilling during cooking.
- Perfect Golden Brown: Make sure to preheat your skillet properly to achieve that perfect golden brown crust on the wraps.
Variations
Different Cheese Options
You can switch up the cheese for fun flavors. Cheddar adds a sharp kick. Feta brings a creamy, tangy taste. Pepper jack provides a spicy twist. Each choice can change the wrap’s flavor and texture. Don’t hesitate to mix different cheeses for a unique blend.
Protein Alternatives
If you want to change the protein, you have options. Turkey works well if you want a leaner choice. Tofu is great for a plant-based option. For beef lovers, use ground beef or shredded beef. These swaps keep the wraps tasty while fitting your diet.
Healthier Options
Looking for healthier choices? Try low-carb tortillas to cut carbs. You can also add more veggies. Bell peppers, zucchini, or mushrooms work well. They add color and nutrients. These small changes make the wraps even better for you while keeping them full of flavor.
Storage Info
Refrigeration Guidelines
To keep your cheesy garlic chicken wraps fresh, store them in an airtight container. Place parchment paper between layers to avoid sticking. They stay good in the fridge for up to three days. After this, they may lose their taste and texture.
Freezing Instructions
You can freeze these wraps for longer storage. Wrap each one tightly in plastic wrap and place them in a freezer bag. They can last up to three months in the freezer. When you’re ready to eat, take a wrap out and thaw it in the fridge overnight. To reheat, warm it in a skillet over medium heat until heated through.
Best Practices
Look for signs of spoilage, like an off smell or mold. If either is present, discard the wrap. When reheating, use medium heat and cover the skillet. This method keeps the wrap crispy while warming the inside. Enjoy your cheesy garlic chicken wraps at their best!
FAQs
How can I make Cheesy Garlic Chicken Wraps gluten-free?
To make these wraps gluten-free, use gluten-free tortillas. Many stores sell them now. Check the label to ensure they are safe for your diet. You can also use lettuce leaves as a wrap. This offers a low-carb option and adds a fresh crunch.
Can I prepare these wraps in advance?
Yes, you can prepare these wraps ahead of time. Make the filling and store it in the fridge for up to two days. You can also assemble the wraps in advance. Just wrap them in plastic and keep them in the fridge. Cook them when ready to serve. If you need to store them longer, freeze the assembled wraps. They can last up to three months in the freezer. Thaw them in the fridge before cooking.
What can I serve with Cheesy Garlic Chicken Wraps?
These wraps pair well with many sides. Here are some tasty options:
– A fresh garden salad with vinaigrette
– Crispy sweet potato fries for a hearty touch
– A bowl of creamy tomato soup for dipping
– Garlic bread to complement the flavors
– Steamed veggies for a healthy choice
Feel free to mix and match based on your taste!
This blog post covered how to make Cheesy Garlic Chicken Wraps from start to finish. You learned about the key ingredients, step-by-step instructions, and tips for perfecting your wraps. I shared ways to customize them and how to store leftovers effectively.
In my view, these wraps are easy to make and delicious. Experiment with different flavors and find what you love most! Enjoy your cooking journey and happy eatin